


Steps Involved In Replacing a Steel String
For a video on this subject, please see one of my YouTube
accounts, which are listed on the "Learn" page.
- The first step is to purchase a replacement string. Virtually all music stores sell individual strings. There is no need to buy a whole set when replacing only one, unless the other strings are in need of changing. There are a dizzying number of options to consider when purchasing a string. Strings come in various gauges and materials. To determine the gauge, you can compare it by eye, or refer to the package of the original set of strings if you have it. It can be rather confusing to decide what kind of metal the string is constructed of (bronze, phosphor/bronze, nickel, etc.). If you're unsure of what kind of string to purchase, you can of course always do some research. (I hope to cover this subject eventually, when I have time to give it the attention it merits.) NOTE: Don't put nylon strings on a guitar meant for steel strings, and don't put steel strings on one built for nylon ones. You will encounter various problems if you violate this rule.

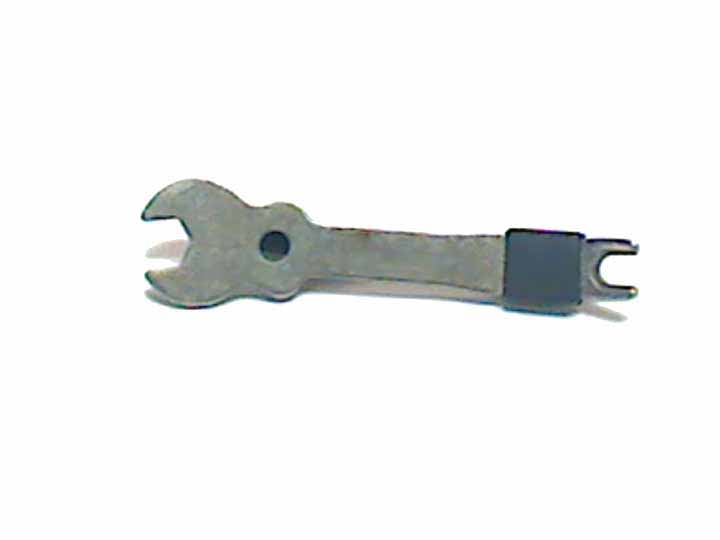
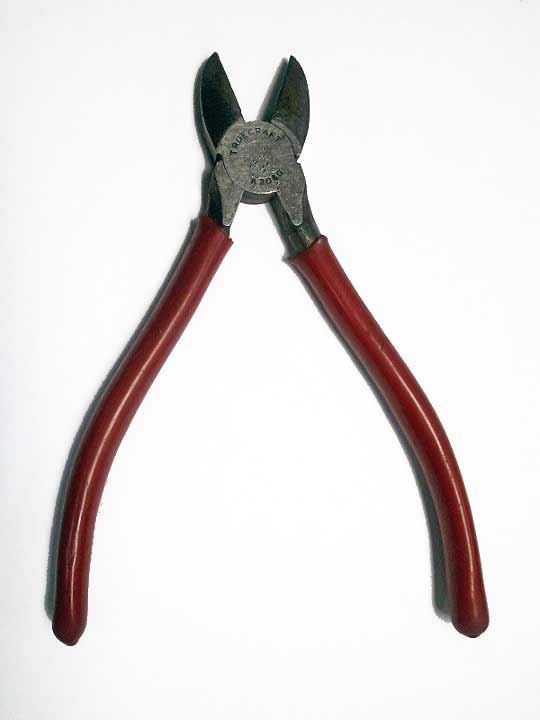
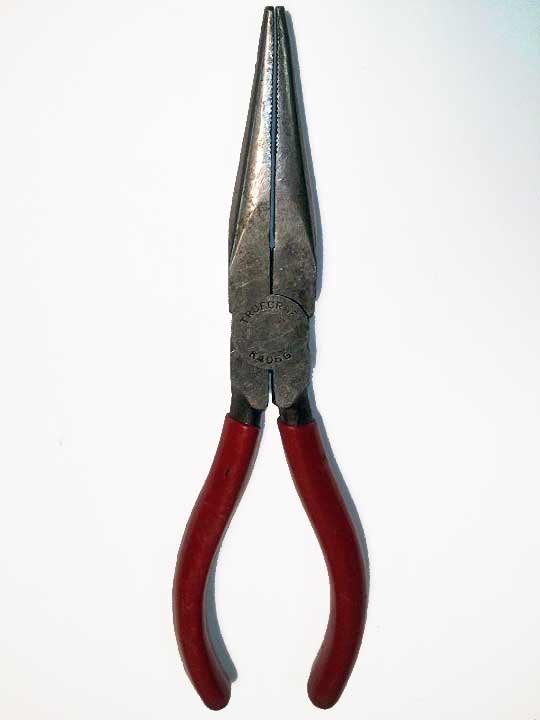
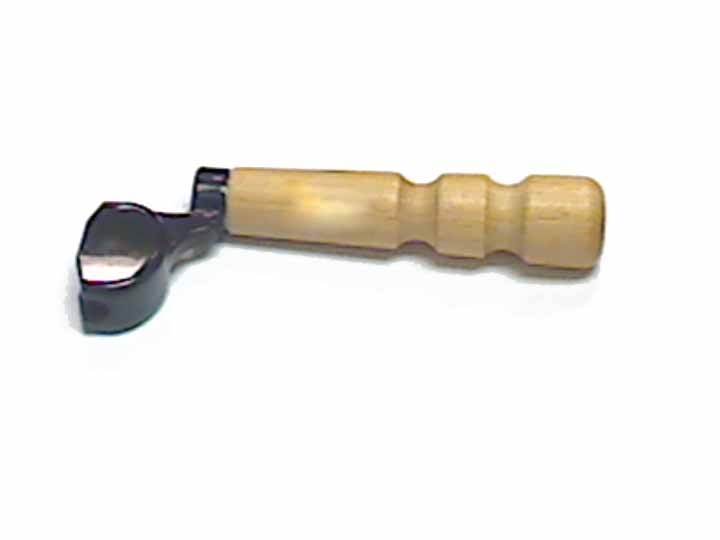
- Gather the necessary tools: bridge pin remover, diagonal cutter, needle nose pliers, and a string winder (the latter tool is optional). Many string winders double as a bridge pin remover.
- Loosen the string using the tuning peg.
- Remove the string from the tuning peg. A needle nose pliers might come in handy here. Careful - you can cut yourself on the sharp edge at this end of the string.
- Remove the bridge pin. Use a bridge pin removal tool. (Or wrap the head of the bridge pin in a cloth to protect your guitar from getting scratched and remove it using the needle nose pliers). WARNING: Don't even think about doing this unless you have loosened the string.
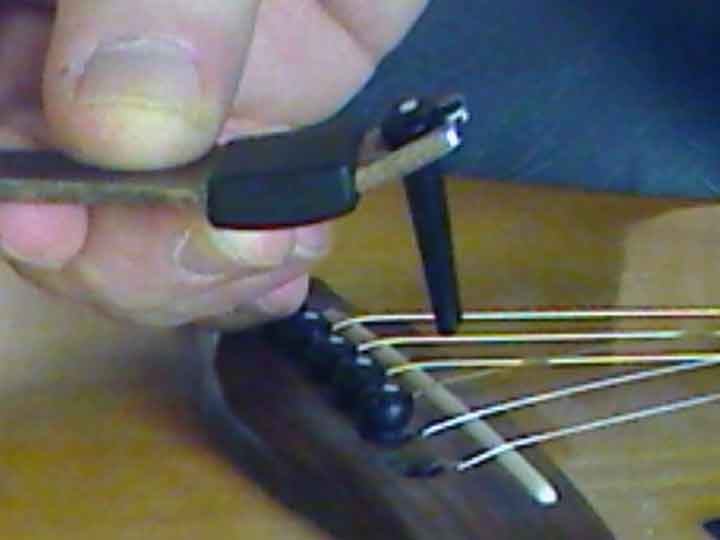
- Remove the string from the bridge pin hole by pulling it out. It might offer some resistance, which is normal.
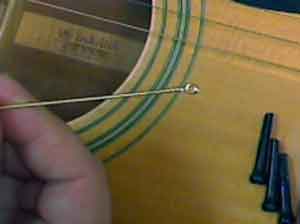
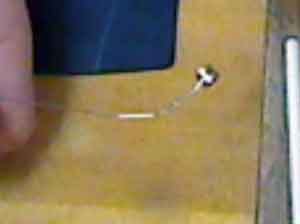
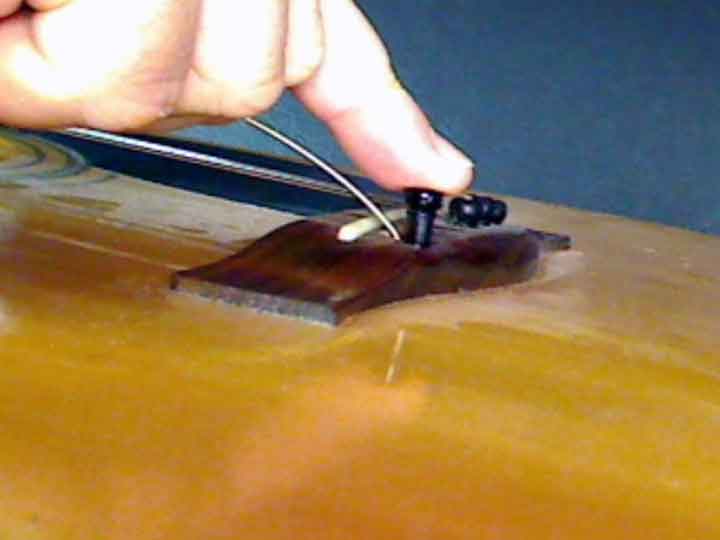
- Prepare the ball end (it's more like a "ring" than a ball) of the replacement string for insertion into the bridge pin hole by bending the string about half-an-inch from the ball end.
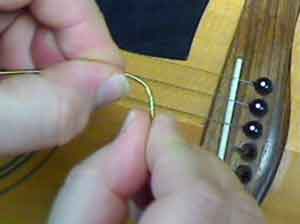
- Insert the ball end of the string into the bridge pin hole until the ball end reaches the inside of the guitar. Make sure the ball end "catches" on the underside of the guitar top. This, rather than the bridge pin, is what keeps the string from pulling out when it is tightened. If the ball end is instead "caught" on the end of the bridge pin, then tightening the string will pull the bridge pin out and the string will come with it. This is a tricky maneuver requiring patience. Before inserting the bridge pin, gently pull on the string to determine if the ball end is "caught" on the inside edge of the bridge pin hole.
- Insert the bridge pin and push it snugly in place. There is no need to use a lot of force to get the bridge pin to adhere to the hole. If you placed the ball end of the string so it is lodged against the underside of the top, rather than at the end of the bridge pin, simple friction will keep the bridge pin from coming out. Remember, the ball end should be "caught" against the inside of the guitar top. The bridge pin simply keeps the ball end from being dislodged from this position. If the string is pulled further into the bridge pin hole when you insert the bridge pin, it's a bad sign. The ball end is likely caught on the end of the bridge pin, rather than lodged against the inside edge of the guitar top.
- Thread the other end of the string through the tuning peg hole. Make sure the string is in the slot on the nut.
- Take up slack until you can place three fingers between the string and the fingerboard (the amount of slack varies depending on the thickness of string - less slack for thick strings, more for thin ones). New strings are several inches longer than necessary. The goal is to wind between one and three rows of string onto the tuning peg. The amount of slack is more critical for the thicker strings. Too much slack will cause a thicker string to quickly fill up the tuning peg, resulting in a ball of string that can end up touching an adjacent string. (This can result in noisy vibrations when the guitar is played, or cause friction as it rubs on an adjacent string.) If you follow the procedure below, you don't have to worry about the string slipping off the tuning peg when it's tightened. Technically, only enough string that results in a little over a half-rotation of the tuning peg is sufficient.
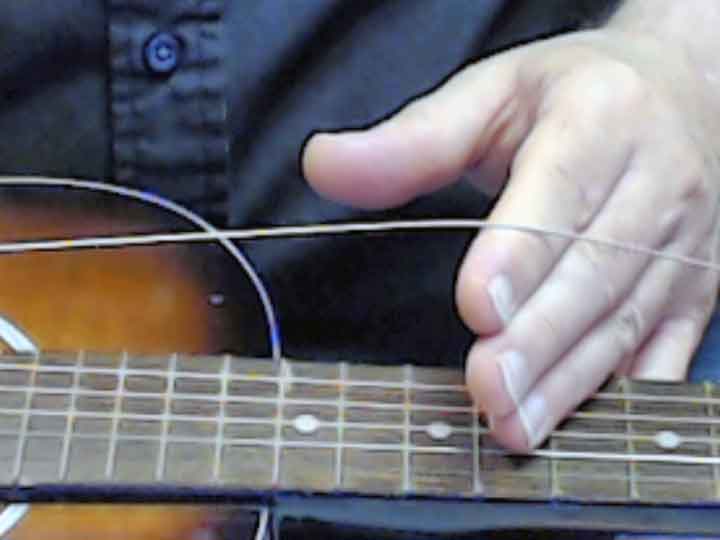

- This next step is critical because it keeps the string from slipping off the tuning peg when you tighten the string. Bend the string around the tuning peg on the inside of headstocks that contain two sets of 3 tuning pegs (towards the floor on an in-line set of six tuning pegs). Pass it under the part of the string that was initially placed through the tuning peg hole. Then pull it "upwards" perpendicular to the guitar neck. The goal is to trap the string between the tuning peg and itself. In other words, the part of the string that you just pulled up ("upwards", away from the guitar) will be trapped between the tuning peg and the part of the string that leads from the tuning peg to the nut.

- Carefully tighten the tuning peg in the proper direction (check the other strings to determine this). While tightening, check the pitch of the string using an electronic tuner, a tuning fork, or some other reliable method, and watch the bridge pin in case it begins to pull out from the bridge. Also make sure the extra length of string is trapped between the string and the tuning peg, which will prevent the string from slipping out when tension is applied (see pictures below). Check again to make sure that the string is in the slot on the nut. Caution: If the string is tightened too tightly it will break, possibly leaving a "whip" mark on the finish of the guitar's wood. It's even possible for a string to cut you or poke an eye when it breaks. This sort of injury is rare, but it can happen, so be careful. Steel strings are wound to considerable tension, so when they snap, it can be a violent act. Be extra careful not to tighten the string too tight. Check the pitch carefully.
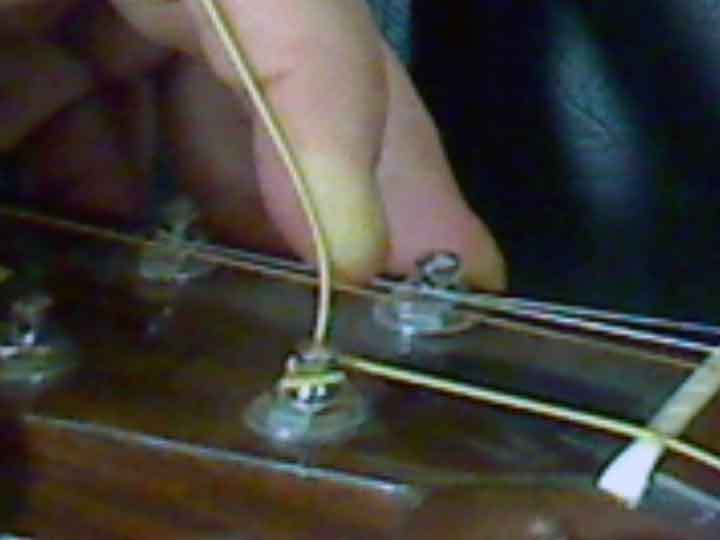
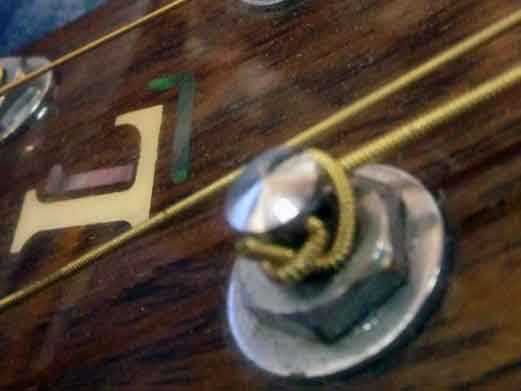
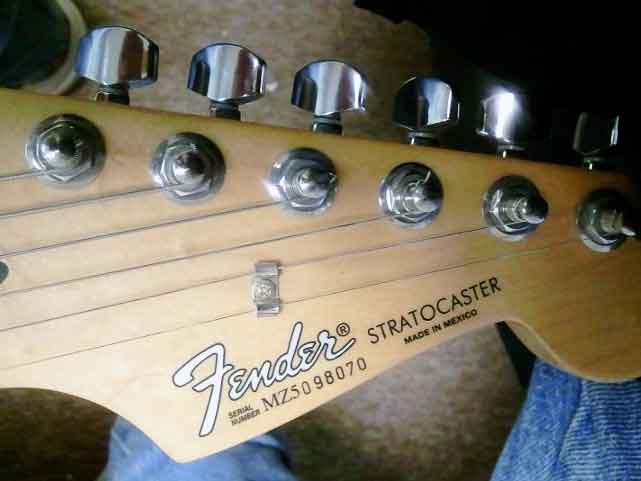
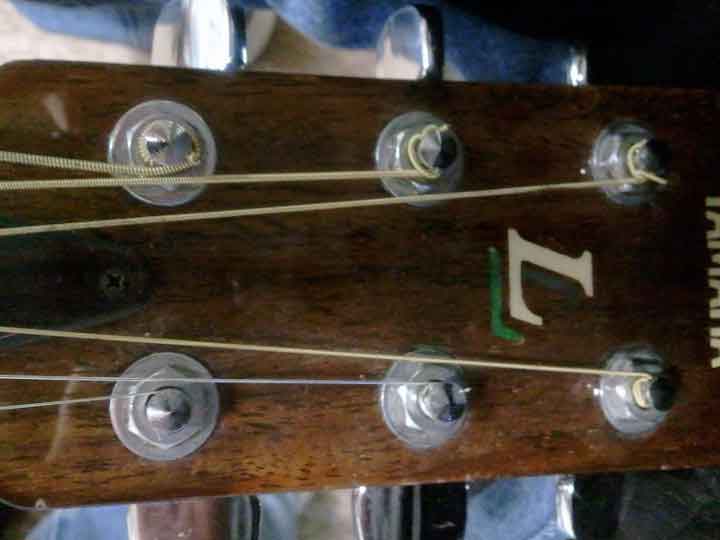
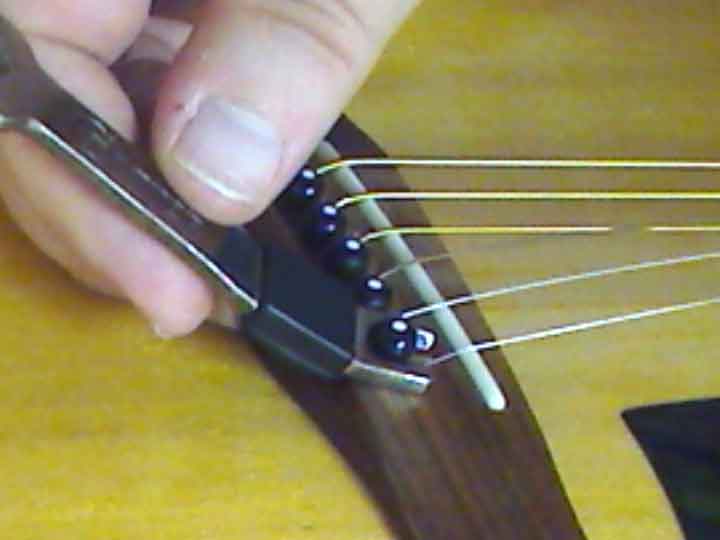
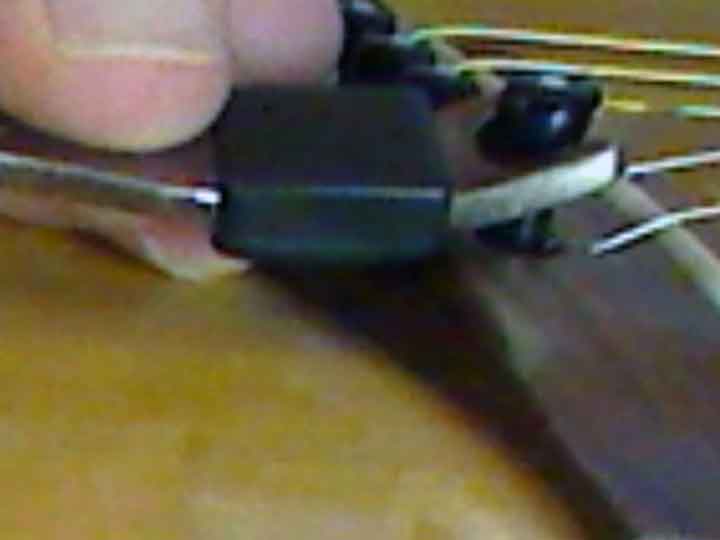
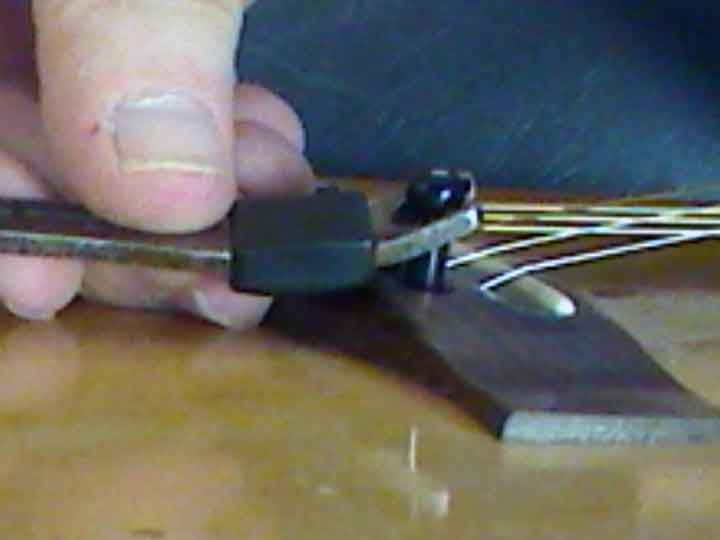
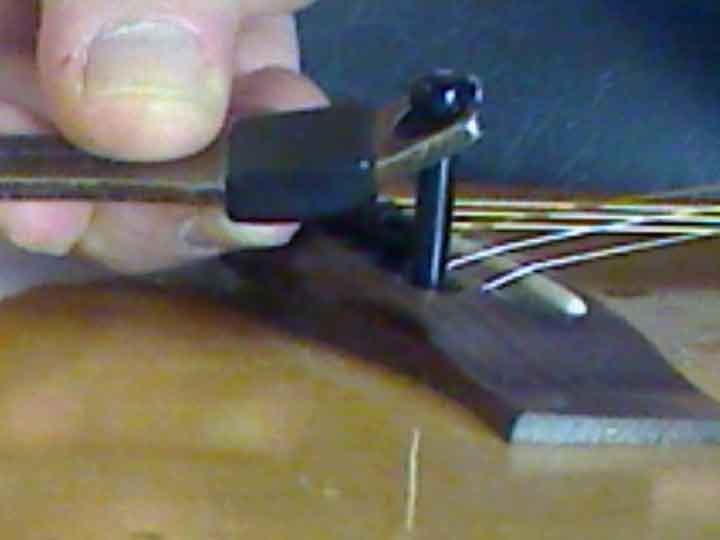
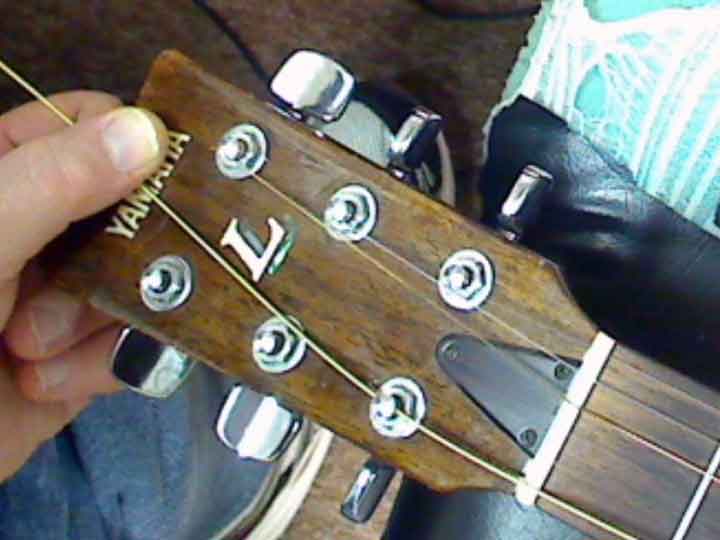
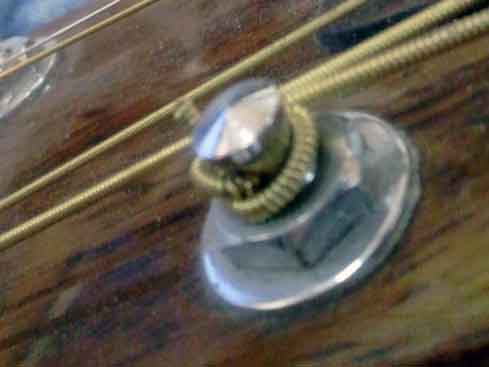
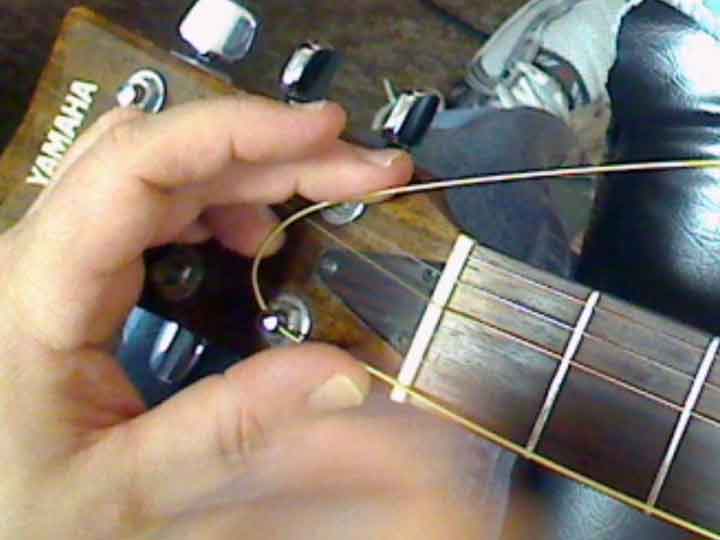
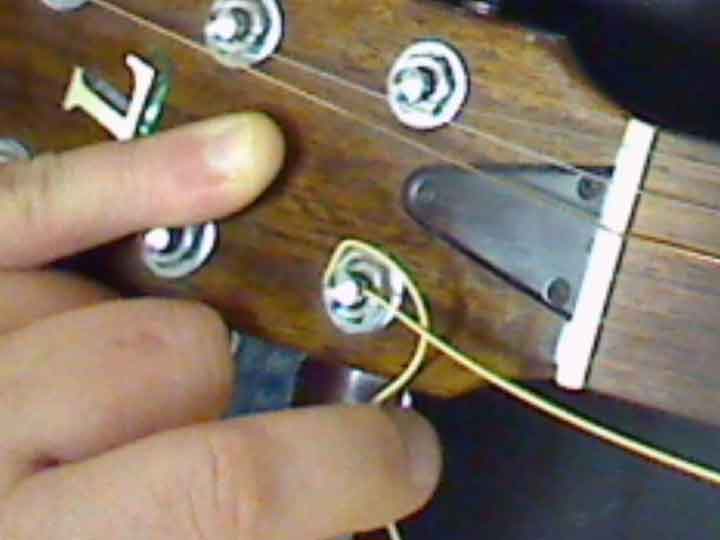
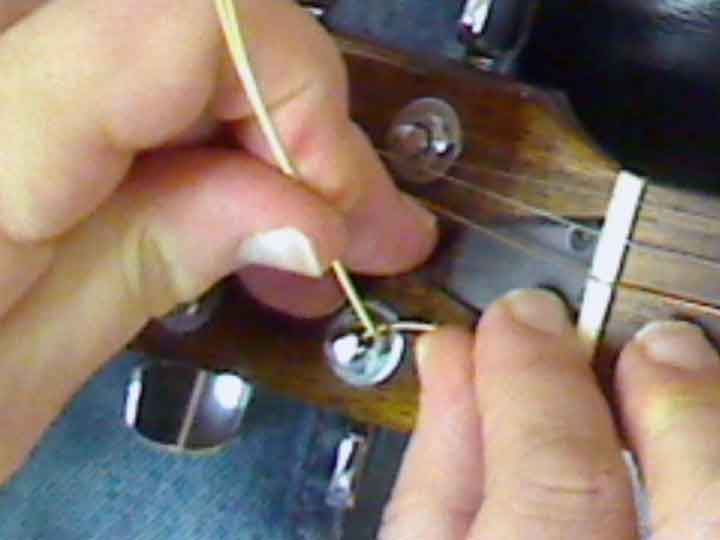
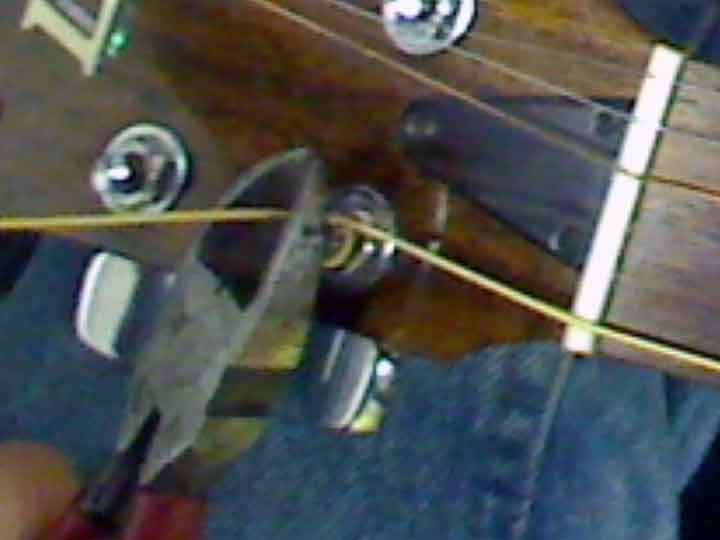
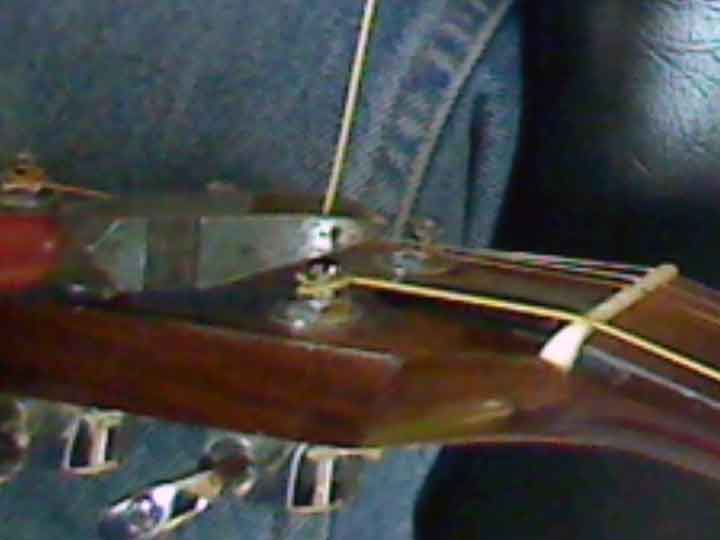
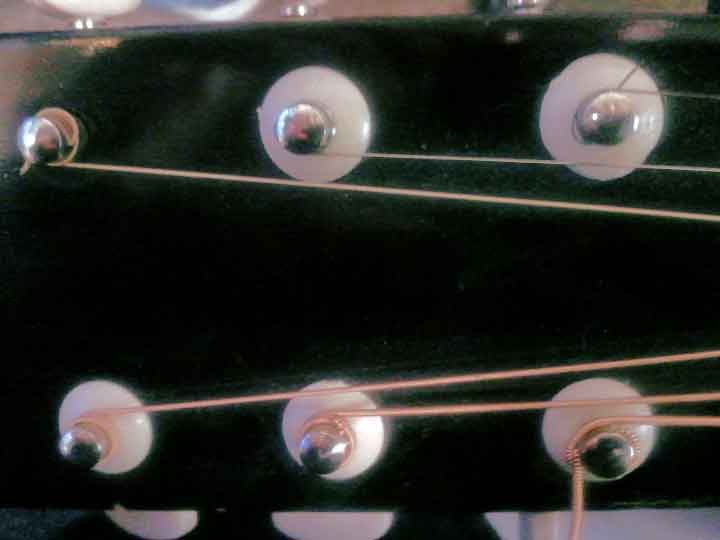 Pictures One and Two. Notice how the string is trapped between the tuning peg and itself. This will prevent the string from coming loose when you tighten it. Picture Three. With in-line tuning pegs (the pegs are all on the same side) the strings should be wound in the same direction (counterclockwise in this case, when looking at it from the front). Picture Four. For non-in-line tuning pegs (three pegs on each side) one set of three will be wound clockwise, while the other set of three will be counterclockwise. Picture Five. This photo shows non-in-line tuning pegs where one of the strings (the first string) has been installed incorrectly. This will result in strings that are confusing to tune (because the tuning pegs turn in inconsistent and unexpected directions), and it can cause adjacent strings to bind on one another, which may create buzzing sounds or place increased tension on the tuning peg itself.
- While tightening the tuning peg, make the string accumulate around the tuning peg in a downward direction, increasing the angle of the string at the nut. This will theoretically increase the amount of the guitar's sustain by applying more pressure at the nut.
- Once the string is tightened to the correct pitch, cut off the extra string near the end of the tuning peg with a diagonal cutter.
- Play to your heart's content and tune often. The string will stretch a lot at first, less in the days after, until it is mostly stretched out. Strings will never stay in tune, so tune every time you play your guitar (pros tune more often) and you (and your audience) will be happier. Keeping your guitar consistently tuned to a standard pitch will keep it sounding the best because it was likely built and set up for this specific pitch level.
Pictures One and Two. Notice how the string is trapped between the tuning peg and itself. This will prevent the string from coming loose when you tighten it. Picture Three. With in-line tuning pegs (the pegs are all on the same side) the strings should be wound in the same direction (counterclockwise in this case, when looking at it from the front). Picture Four. For non-in-line tuning pegs (three pegs on each side) one set of three will be wound clockwise, while the other set of three will be counterclockwise. Picture Five. This photo shows non-in-line tuning pegs where one of the strings (the first string) has been installed incorrectly. This will result in strings that are confusing to tune (because the tuning pegs turn in inconsistent and unexpected directions), and it can cause adjacent strings to bind on one another, which may create buzzing sounds or place increased tension on the tuning peg itself.
Website and most graphics are created inhouse by Jeff Anvinson, Owner/Operator of JLA Music
Some graphics are purchased from Can Stock Photo, used by permission, and are Copyright
© Can Stock Photo
JLA Music takes care not to infringe on anyone's rights. Please contact us at jla@jlamusic.com if you have questions.
Copyright 2023 © Jeffrey L Anvinson