


How To Change Strings On a Nylon String Guitar and Oil the Fingerboard While You're At It!
Anyone who plays a nylon string guitar for any length of time knows that the strings can start to sound dull fairly quickly. When I play a lot of classical guitar - and I can afford it - I change strings every few weeks. Lately though, as I've gotten busier with other things, and money is in shorter supply, I sometimes go for months without changing strings.
About once a year, at the same time as I am changing a set of guitar strings, I oil the fingerboard.
Today, faced with changing some very outdated nylon strings, I decided to play two strings with one pick (a variation on killing two birds with one stone, which is a ridiculously violent metaphor) and oil the fingerboard at the same time. Always looking for things to put on my website that people may find helpful, I took pictures and wrote the following article. I hope you find it helpful.
Follow These Steps To Change Your Nylon Strings and Oil the Fingerboard
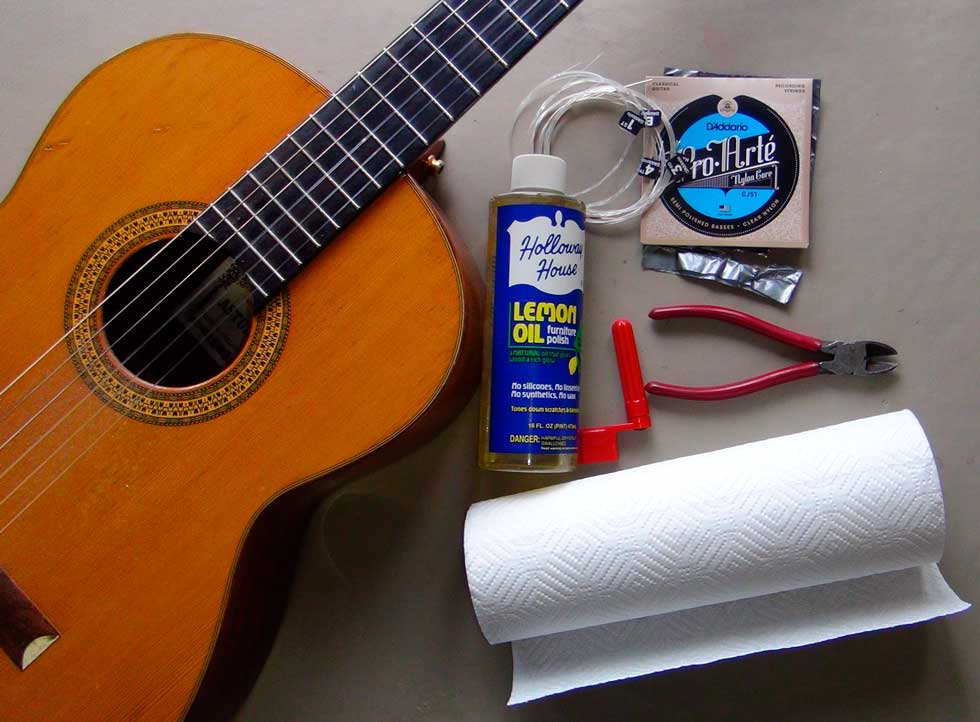
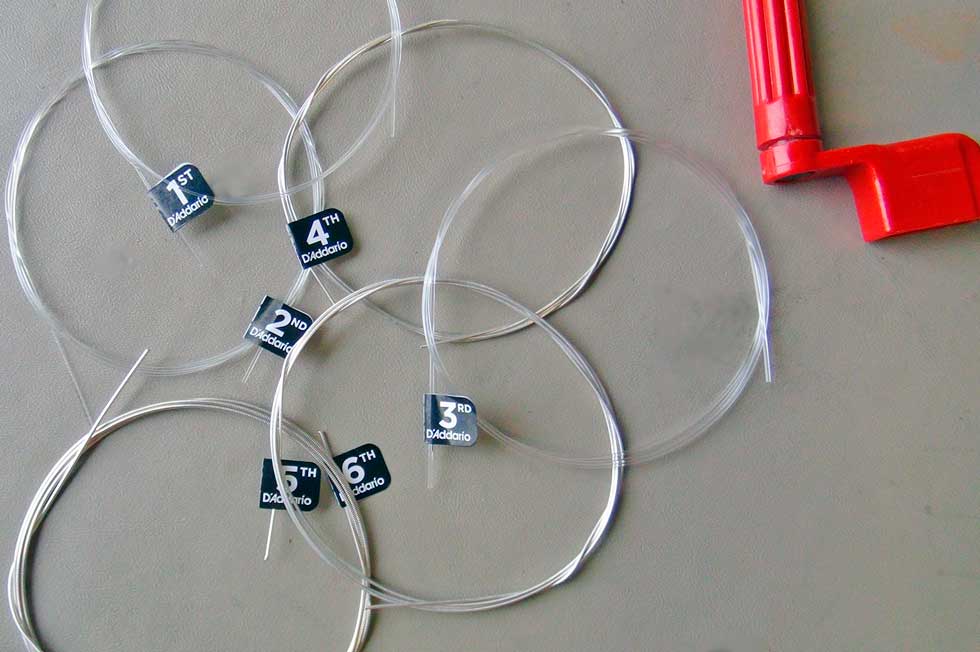
1. Gather everything you need to do the job: guitar, lemon oil, diagonal cutter, string winder, strings, paper towels.
2. Loosen the strings. You can do this by hand, but a string winder speeds up the task.

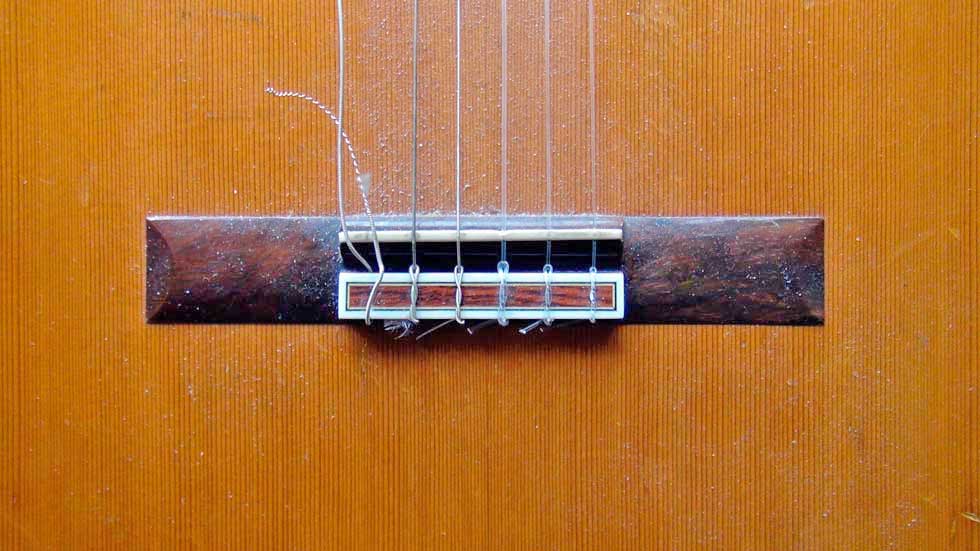
3. Remove the strings. Nylon string guitars use a special bridge onto which you tie the strings (more about this later). Removing the strings is simply a matter of untying them (make sure you've loosened the strings first!). Removing the strings from the tuning pegs is equally simple. Notice how dirty my guitar is? Nasty, right? We'll clean it later. ;-)

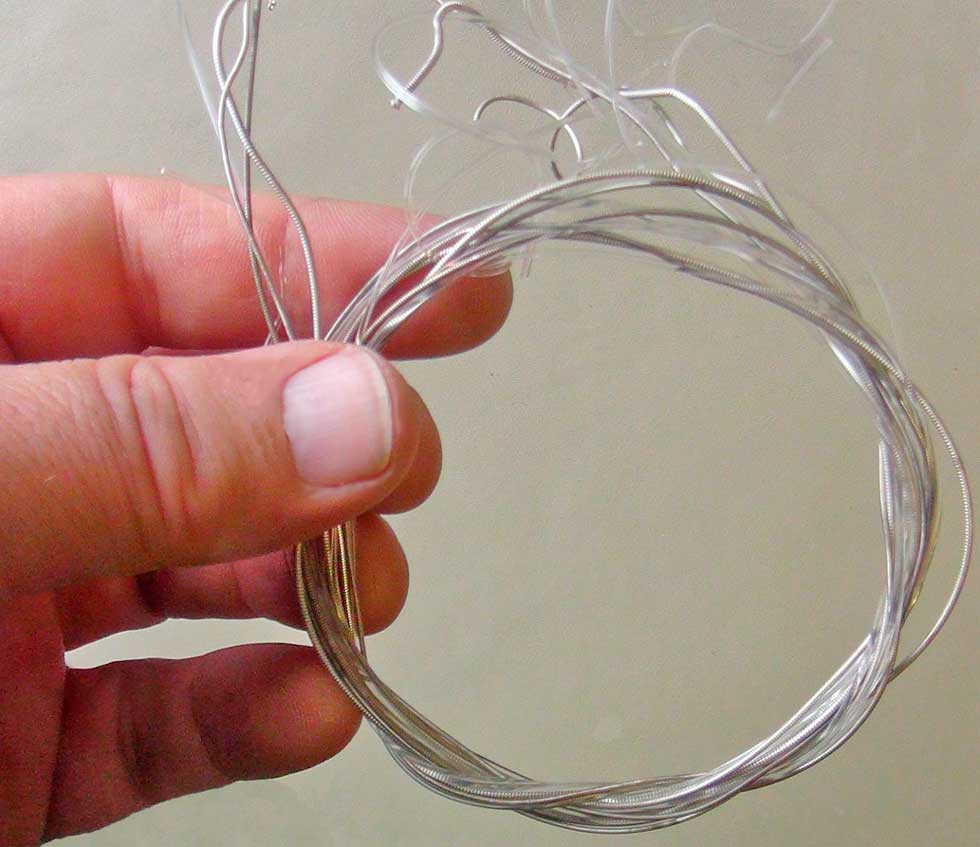
4. Keep the used strings in case you break one later. A spare used string comes in handy when you forget to order new ones. Wind them up in a circle and throw them in your guitar case. They'll never sound as good as new ones, but they're better than nothin'!
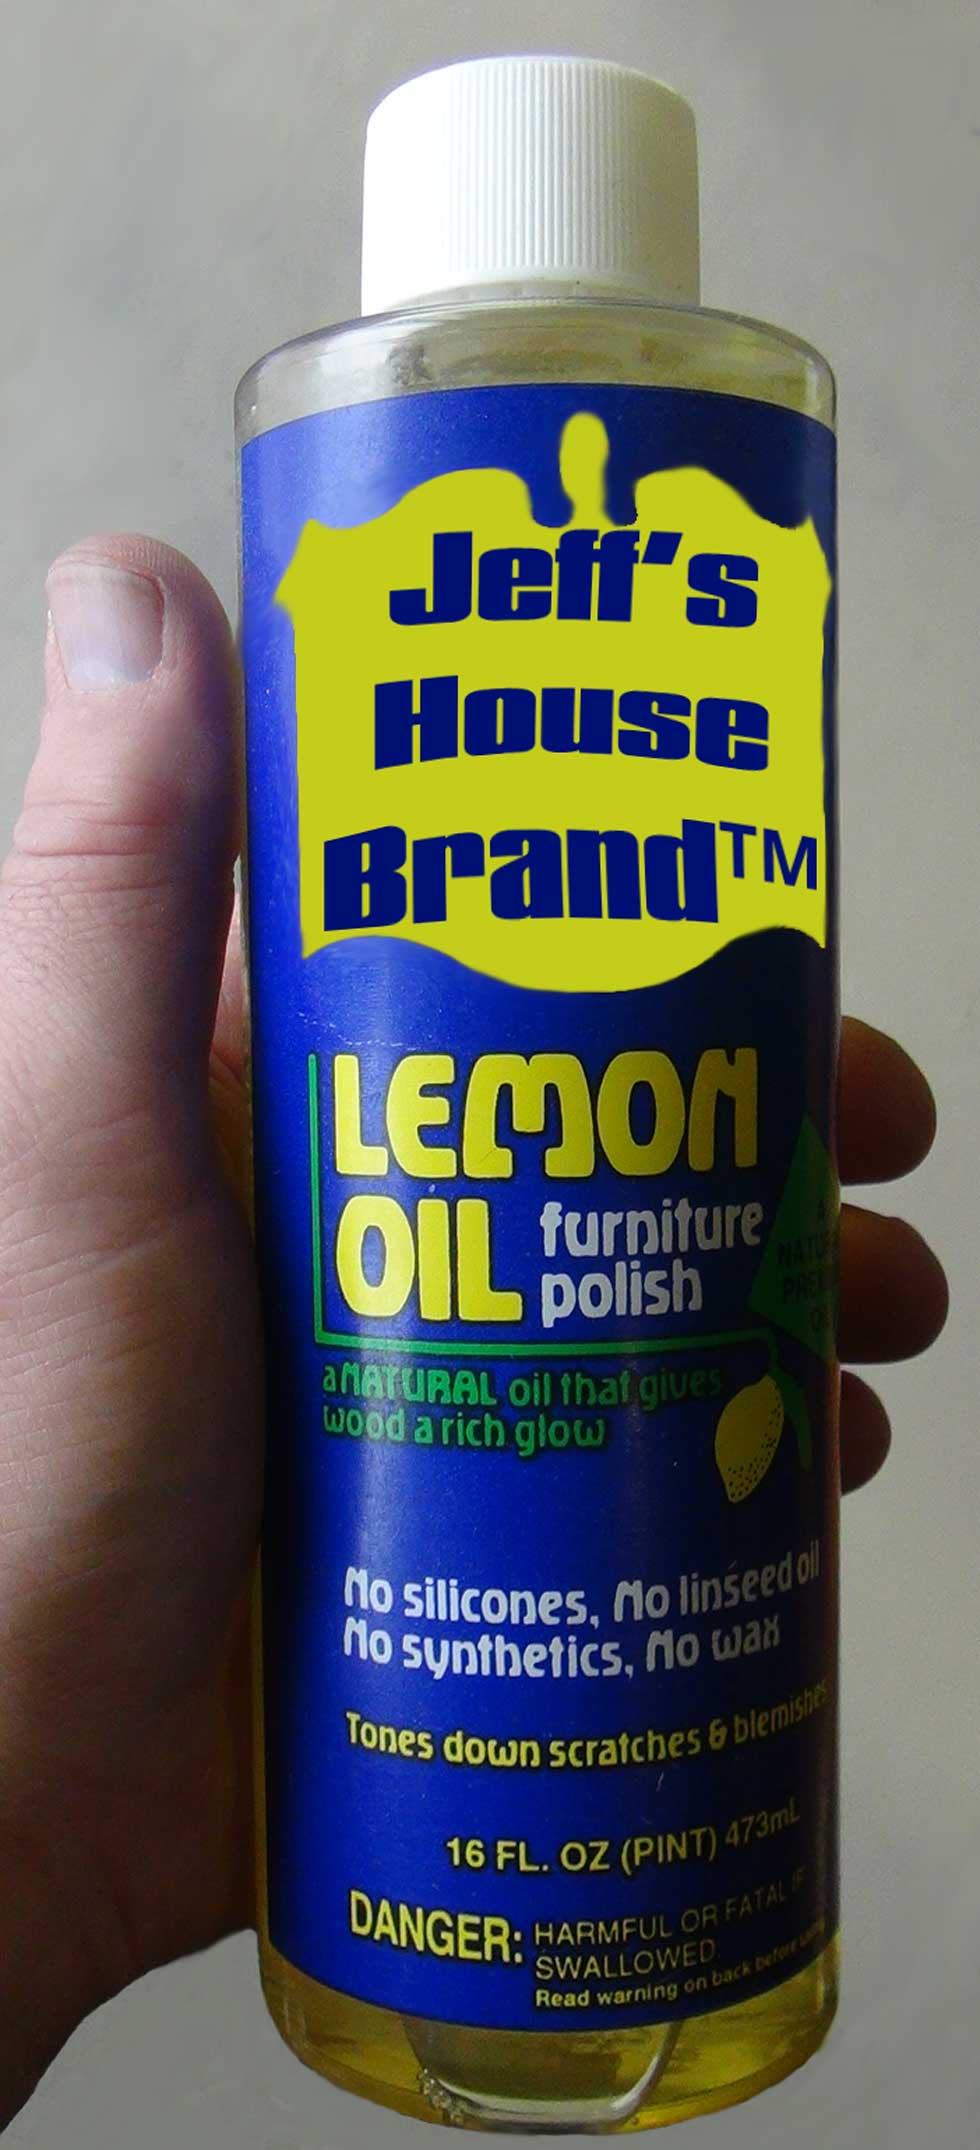
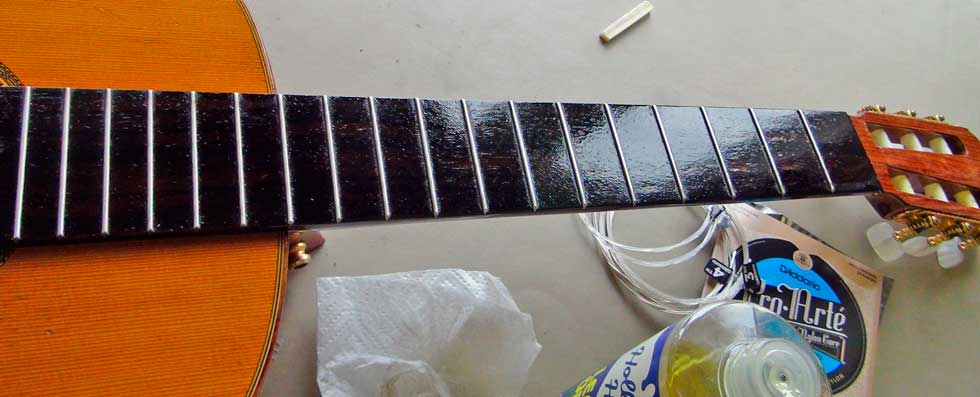
5. Break out the lemon oil! It's time to grease up the skids! ;-) You can get lemon oil on the cheap almost anywhere and it'll last for decades. (Honestly! I've had this bottle for a very long time - but it's really not my brand, like the label appears to say!) ;-) No need to buy the fancy stuff they'll try to sell you at a guitar store. Plain ol' lemon oil from your local general store will do the trick. Some people use other kinds of oil but lemon oil works for me. It smells good too! Just don't make lemonade out of it! ;-) (Note the warning near the bottom of the bottle!)
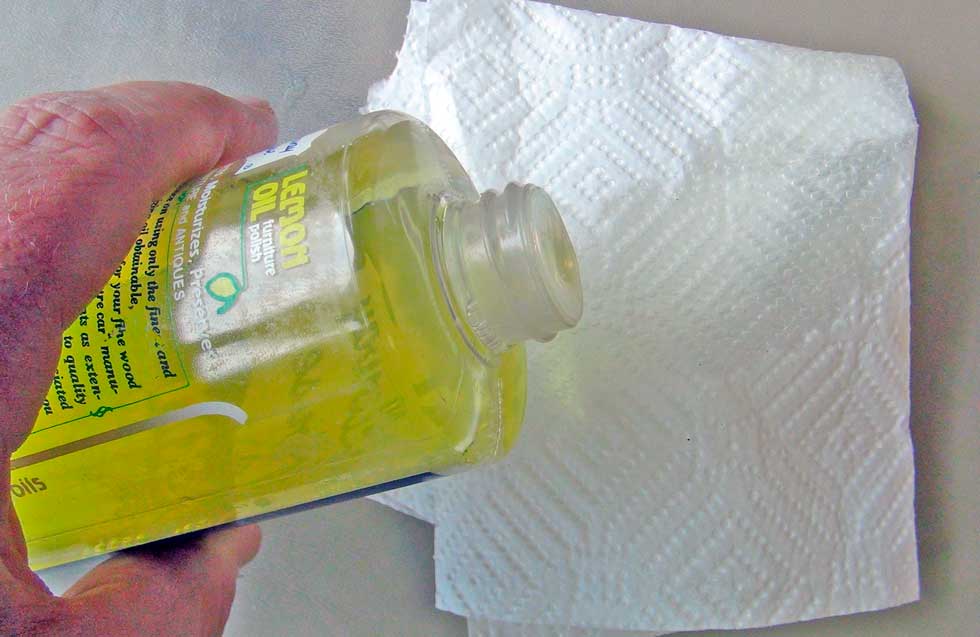
6. Pour a generous portion of lemon oil on a clean cloth. For this job I used a paper towel, but you might prefer to use a clean, lint-free, cotton cloth. I don't really think it matters much as long as the cloth is clean.
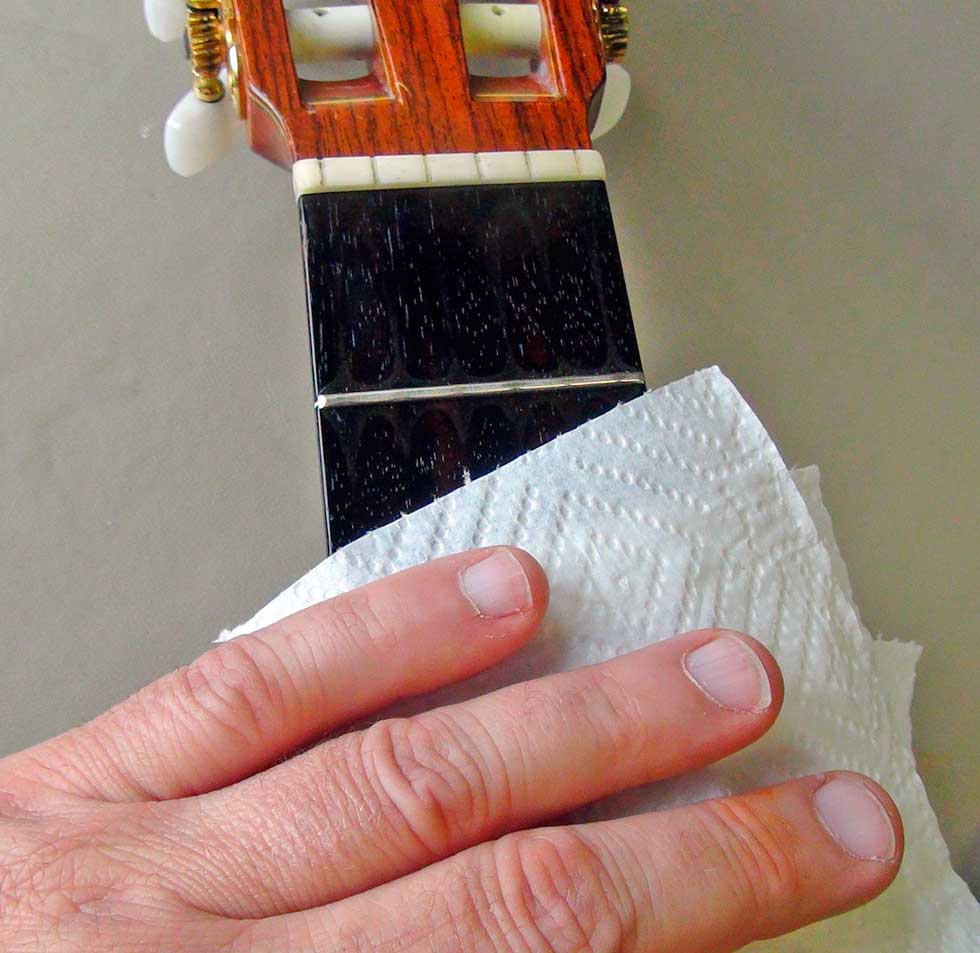
7. Rub the lemon oil into the entire fingerboard, even the around the edges. Be generous! That neck is thirsty, just like it has spent years in the desert! It'll drink in that lemon oil, like, well, lemonade! ;-) While you're at it, you might scrub some spots on the fingerboard a little harder to remove ground-in dirt.

8. After you're done slathering the fingerboard with lots of lemon oil, it should be wet. Now let it soak for five or ten minutes so the wood can absorb it.
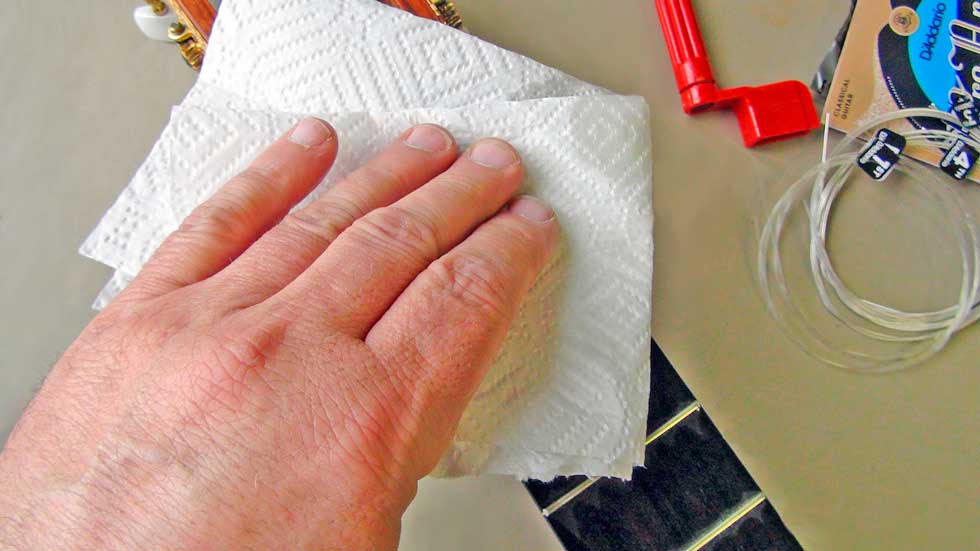
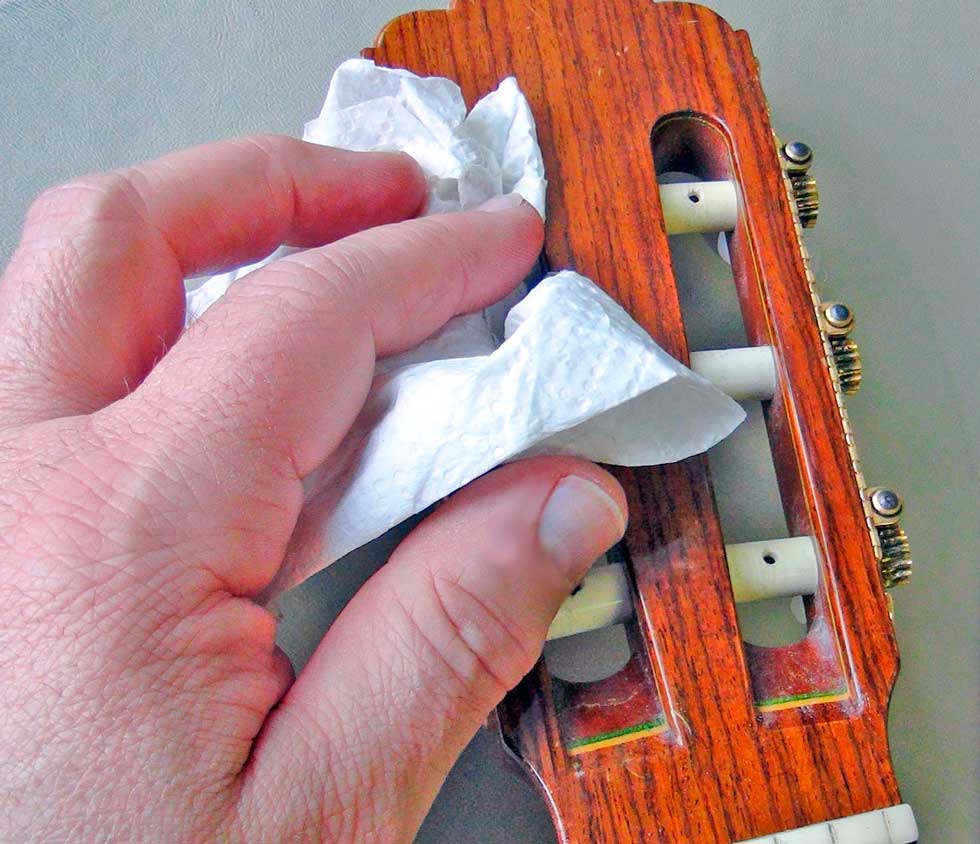
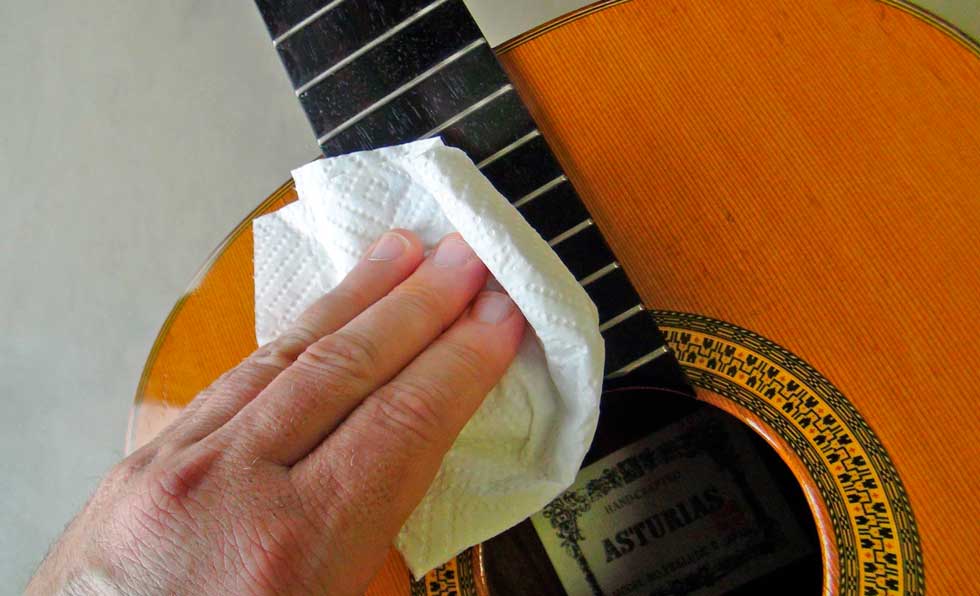
9. While you're waiting for the oil to soak in, remember how dirty my guitar was? I bet yours isn't quite as filthy, but I'd also wager that it's not fresh and clean either. Now's the time to clean it up. Take a look at the paper towel or rag that you used to apply lemon oil to the fingerboard. Looks dirty, right? Grab a clean towel and apply a little bit of lemon oil to it. This time don't use too much. Use this lightly-soaked towel to clean the rest of your guitar. You could also use just plain water (a little bit) but the lemon oil works great. While you're cleaning, don't mess with the fingerboard because the oil needs to sit there and soak in.
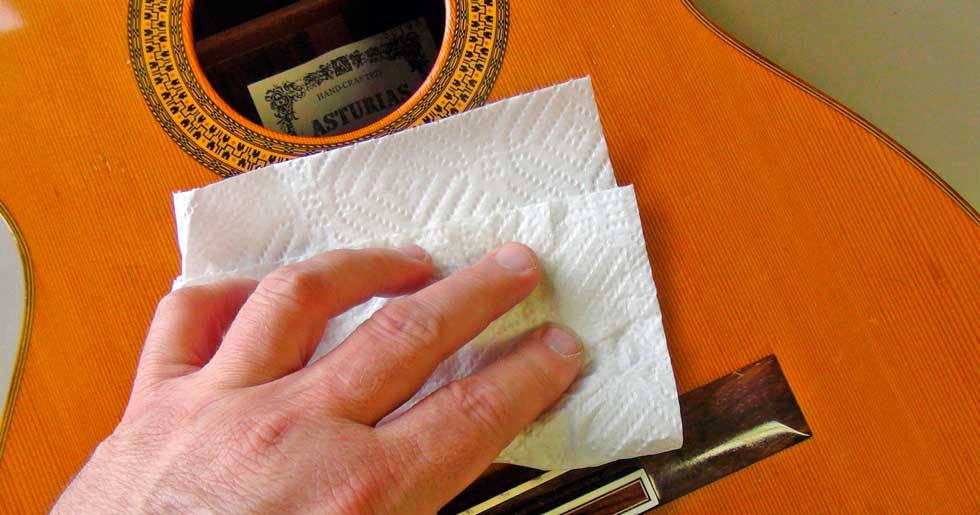
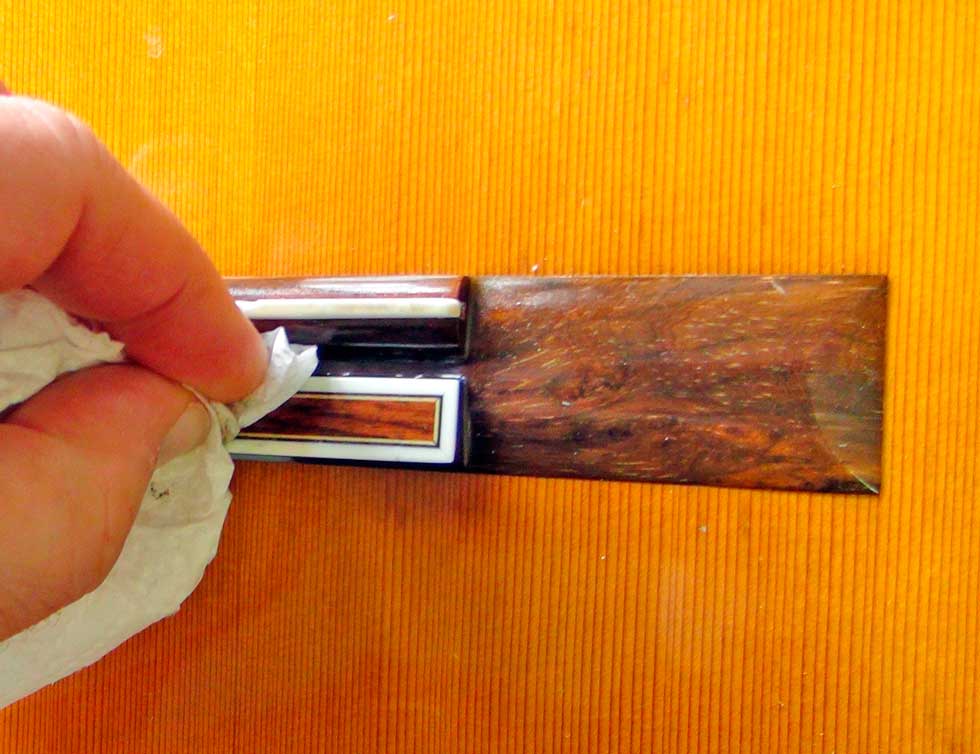
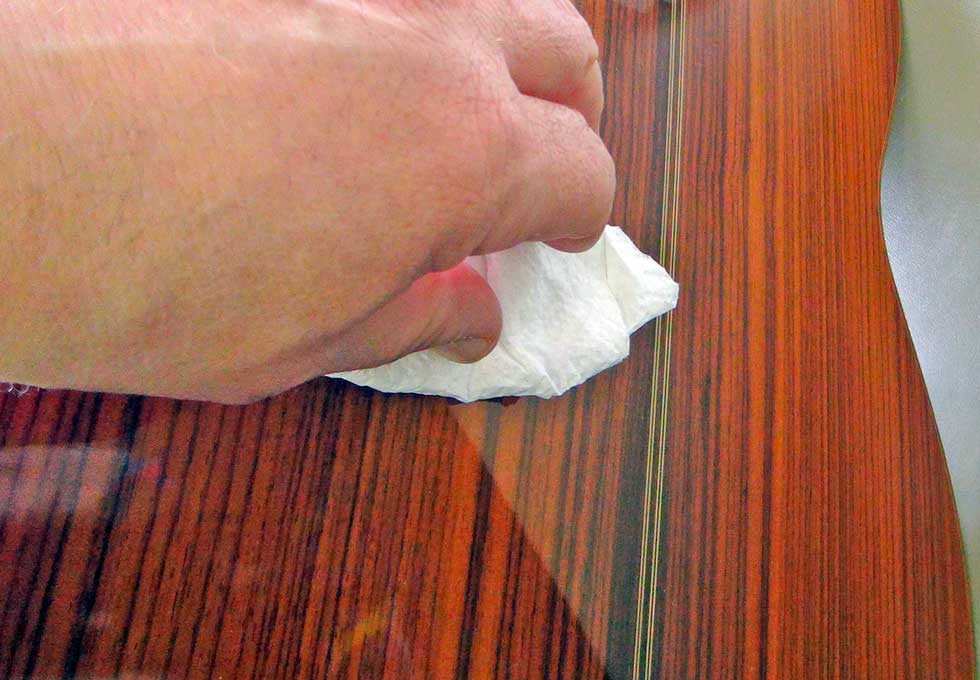
10. By now your guitar's looking really spiffy, right? After all of that cleaning it's probably about the right time to attend to all that oil that's been sitting on the fingerboard. You'll probably notice that much of the oil has soaked in, leaving only a slight residue. However, if your fingerboard looks as dry as a hot metal stove, then you might give your fingerboard another shot of lemon oil. But chances are that you won't need to give it another shot of the slippery stuff. So, now's the time to wipe off any excess oil from the fingerboard. Grab another clean towel and mop up any excess lemon oil. You should clean up any excess oil on the rest of the guitar too.
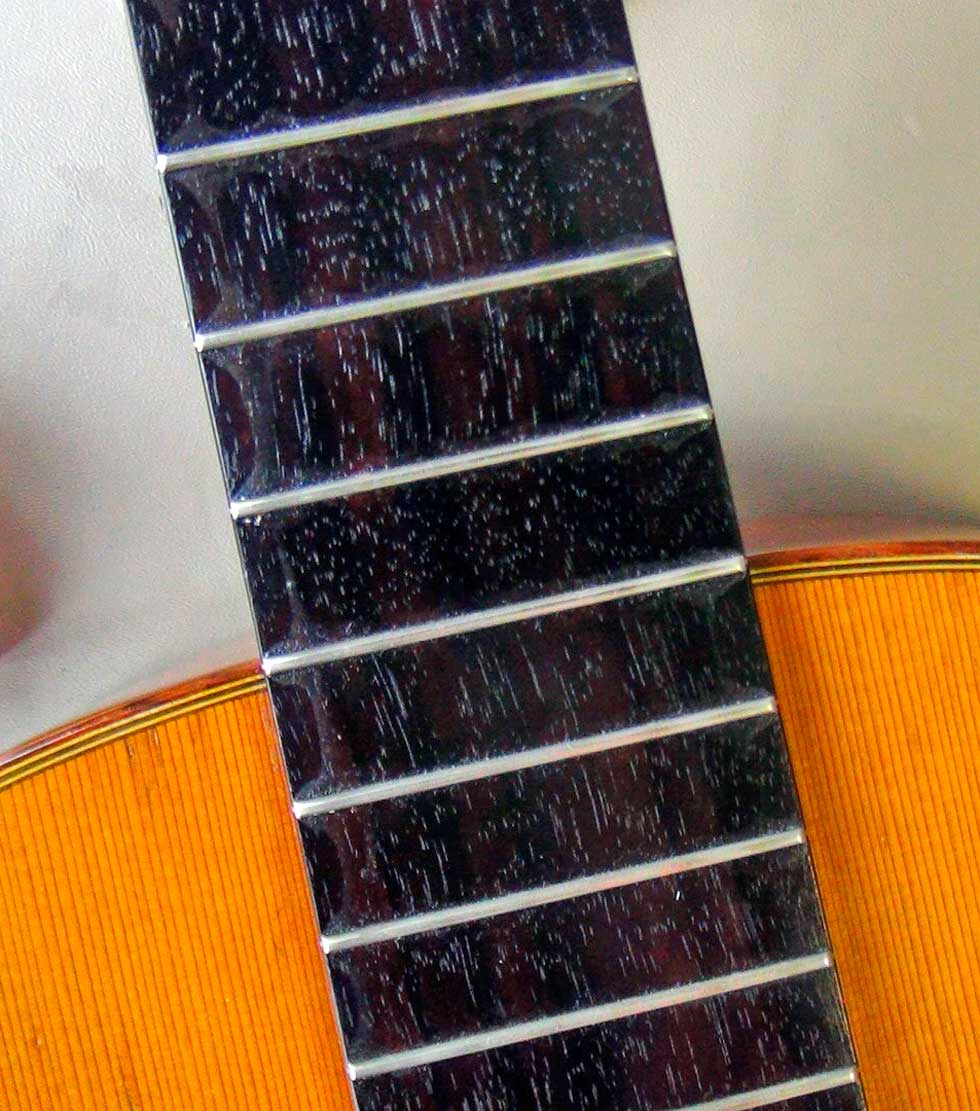
11. Doesn't that fingerboard look shiny and pretty? Resist the temptation to get lost in your reflection like Narcissus! We've got to get on with the rest of the job! There's guitar stringin' and music makin' to do!
12. Break open the pack of new strings. My favorite nylon strings are D'Addario Pro Arté Recording Strings, EJ51. I've used them for years and they have not let me down. They have semi-polished bass strings to reduce the squeaky sounds and they're high tension, which I've found over the years to produce the best sound. (By the way, I don't work for D'Addario so my advice is unbiased.) They're not the cheapest strings you can buy, but I think they're more than worth it.

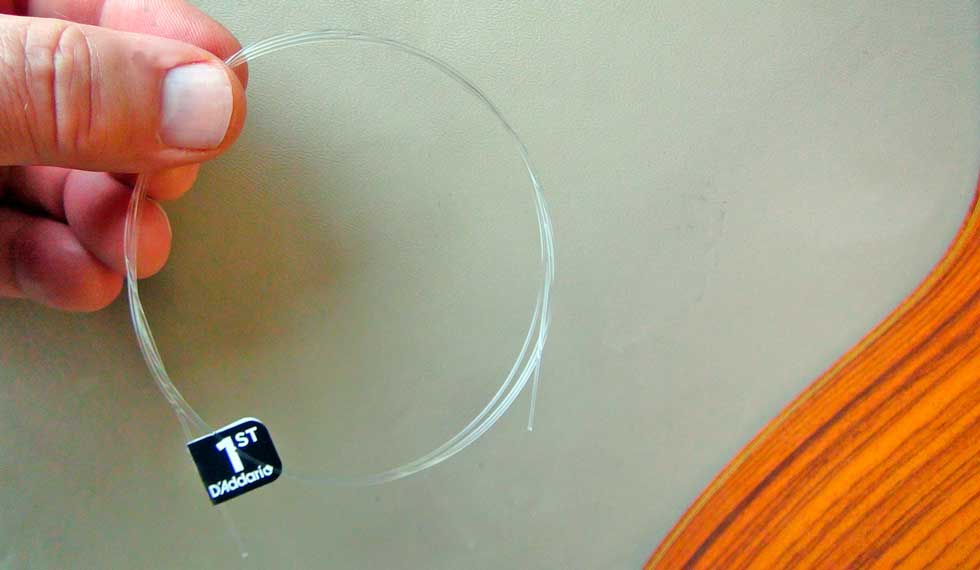
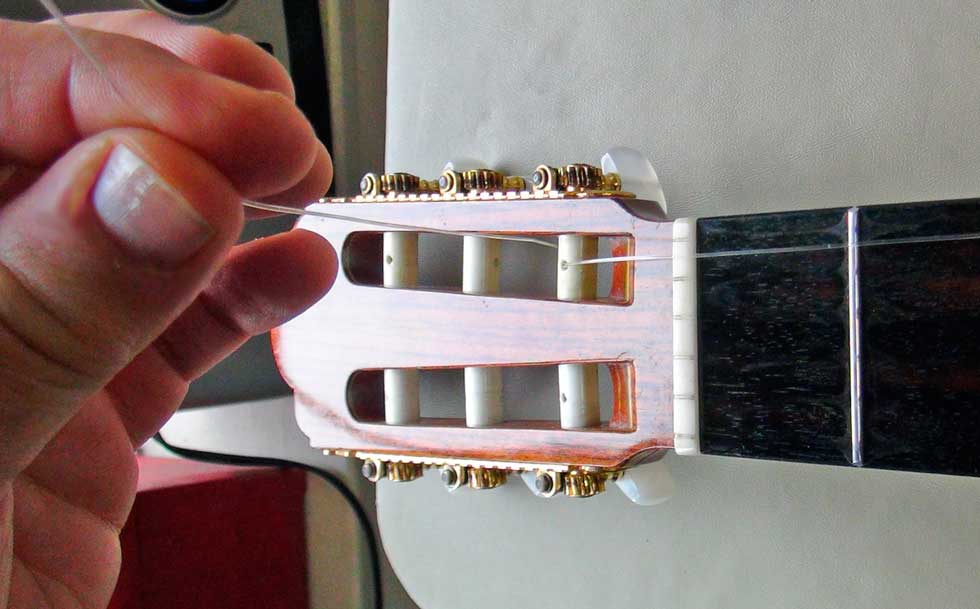
13. A new set of nylon guitar strings will be individually marked with the string number, the pitch, or both. Let's install the first string first. It's the most problematic one because it is strung at the highest tension and the plain nylon construction makes it slippery, with a tendency to slip out when it's being tuned up to pitch. If you're not careful, an improperly installed first string can leave a "whip mark" in the finish of your guitar when it slips out at high tension as you're tuning the string up to pitch. Let me give you the secret to avoiding this mistake in our next step.
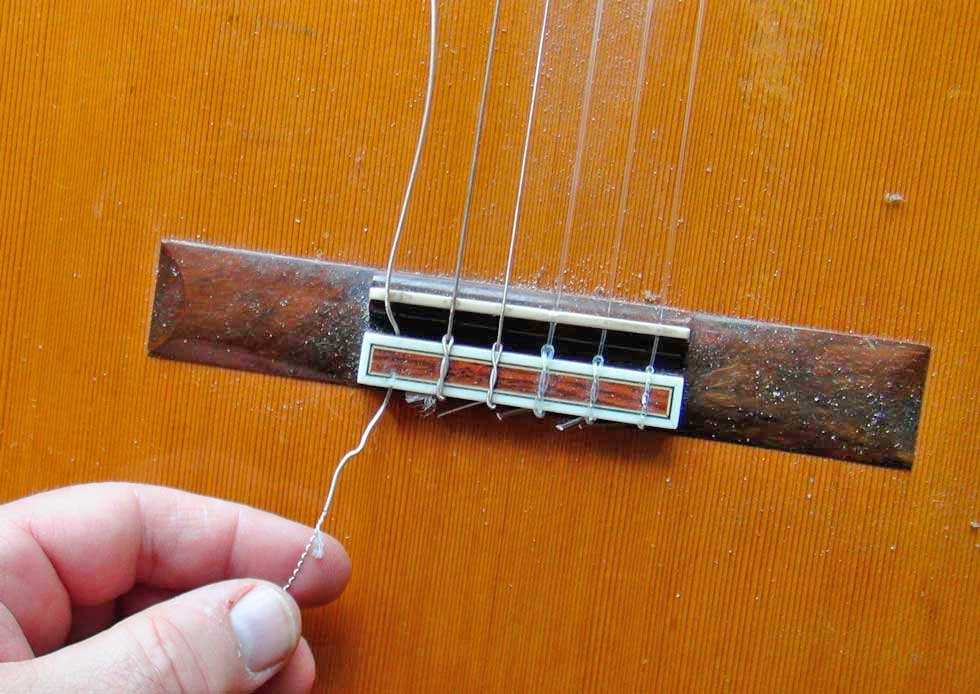
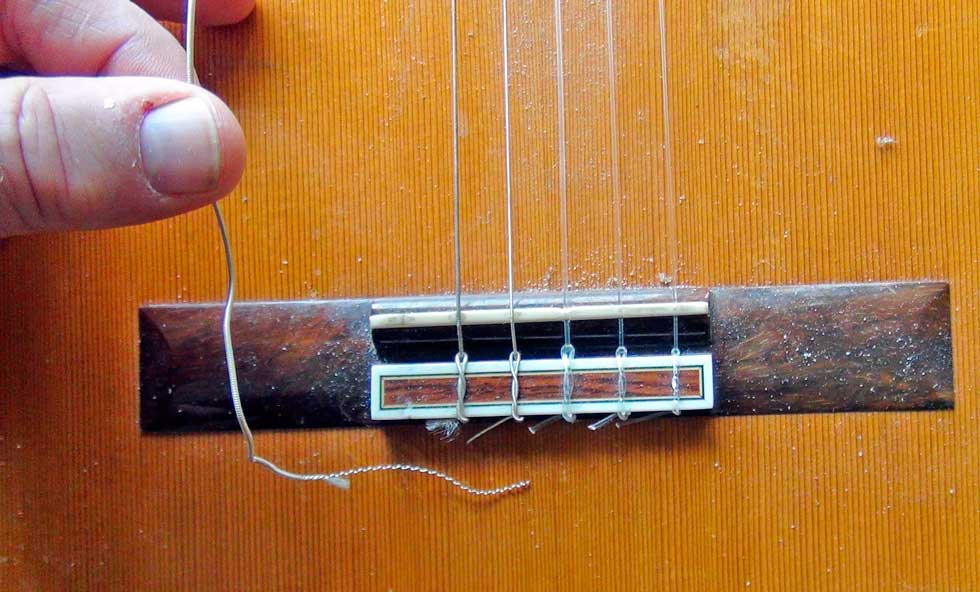
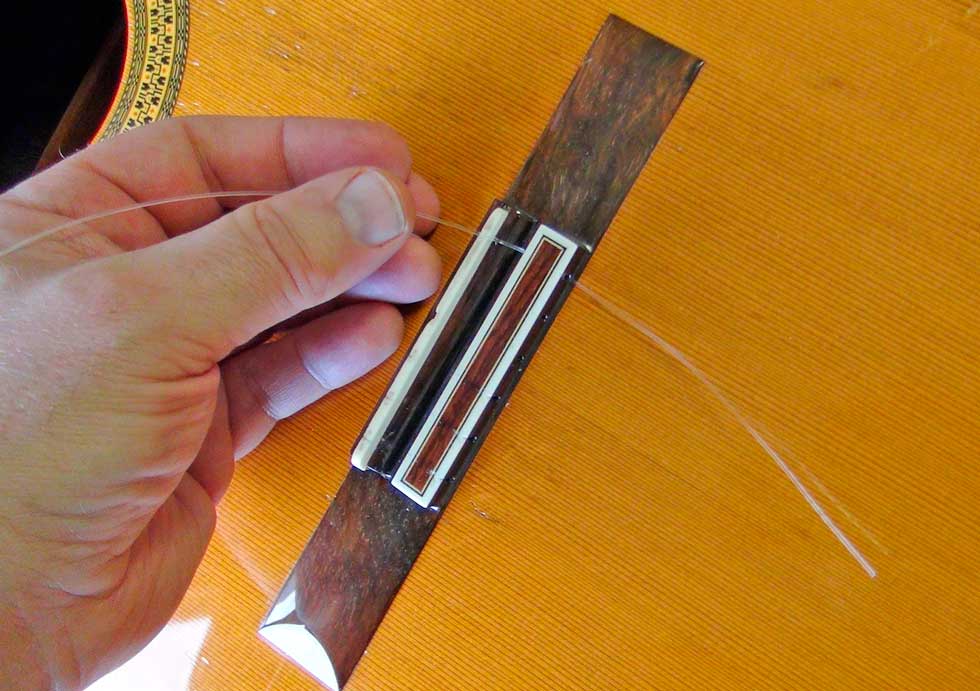
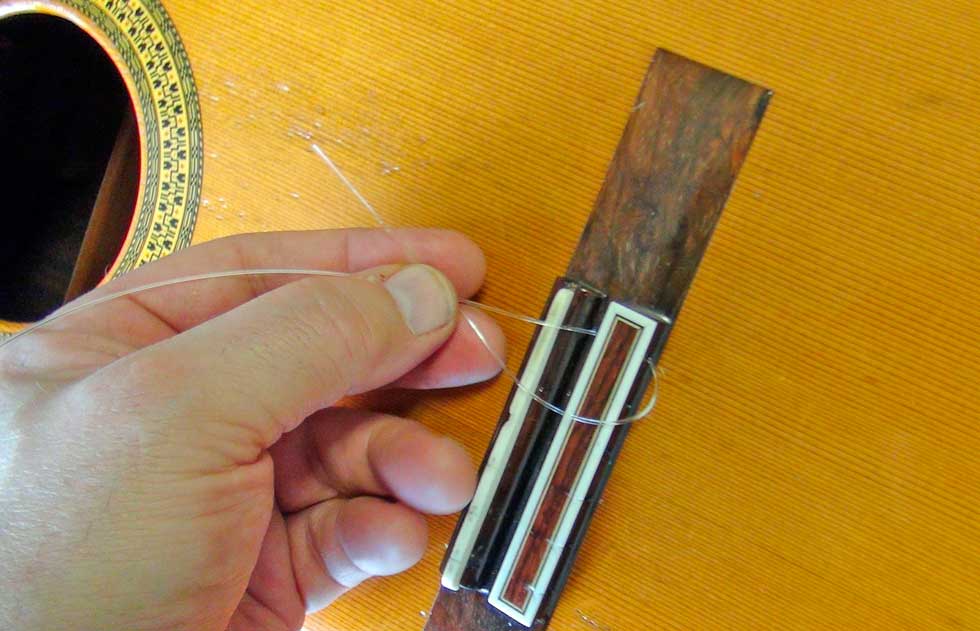
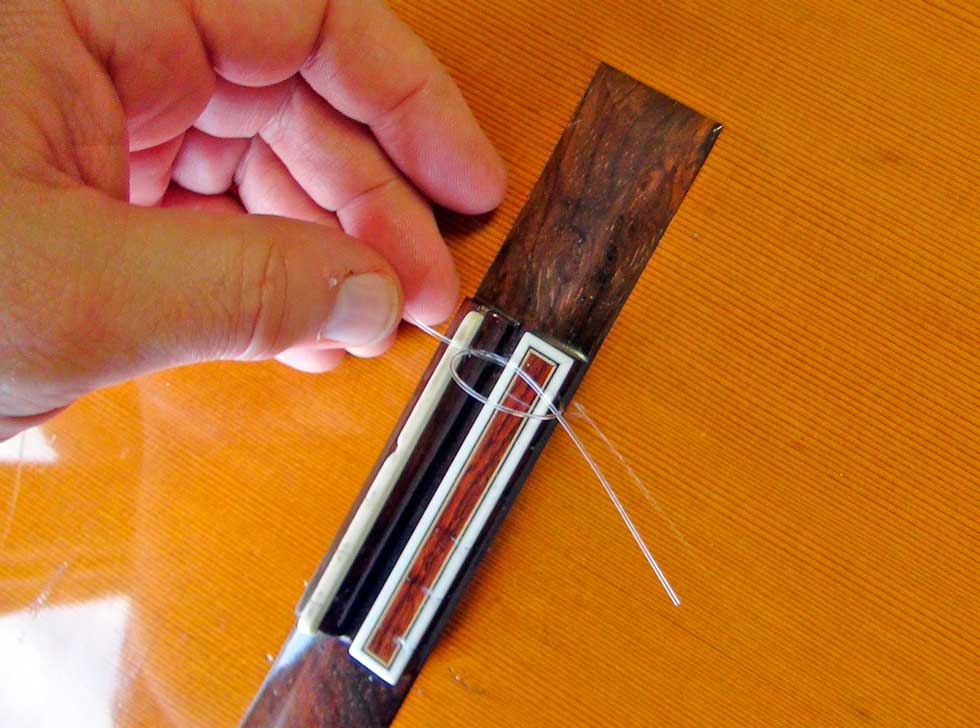
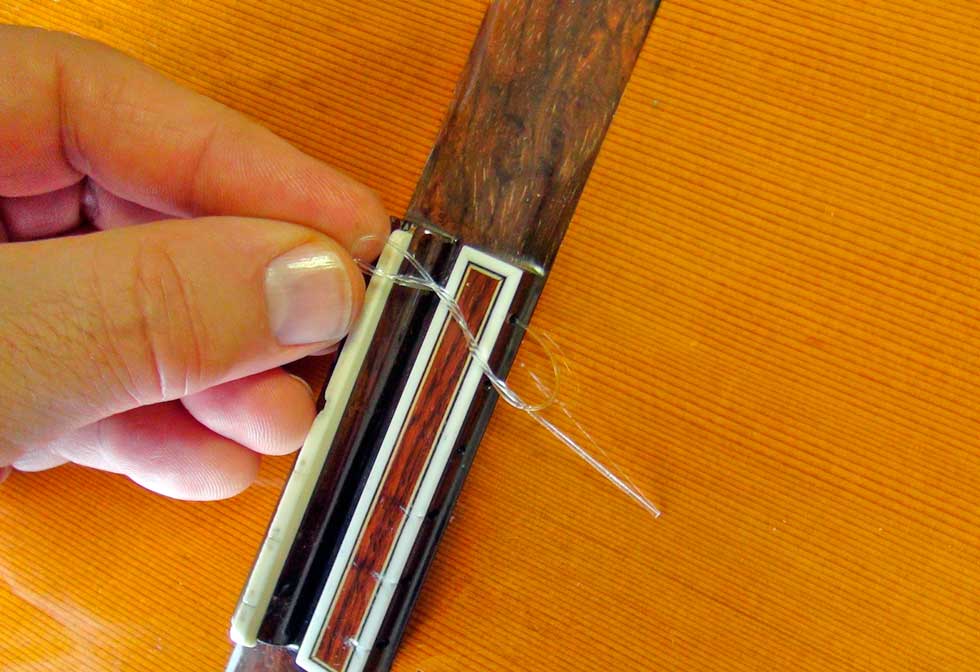
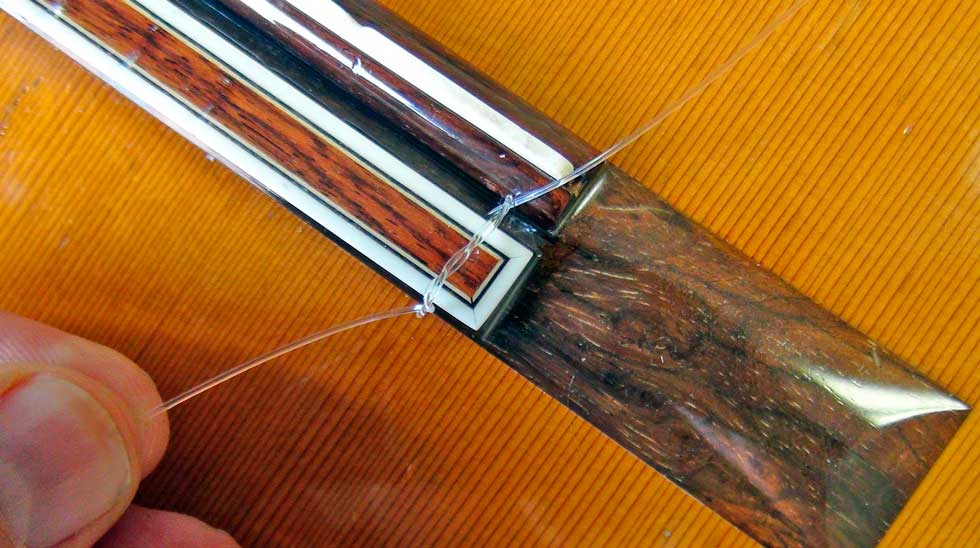
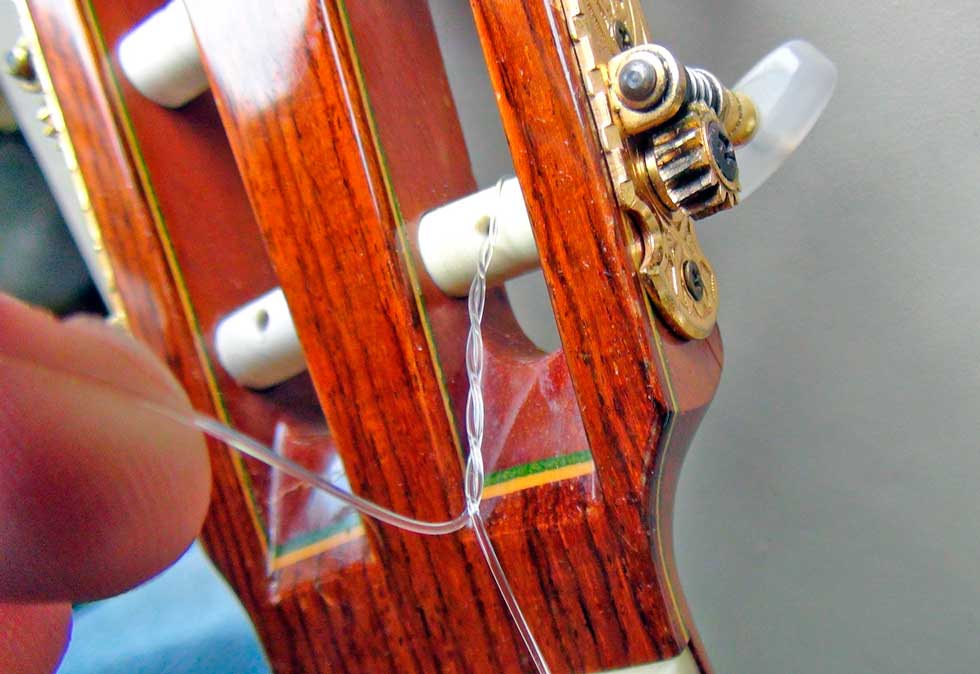
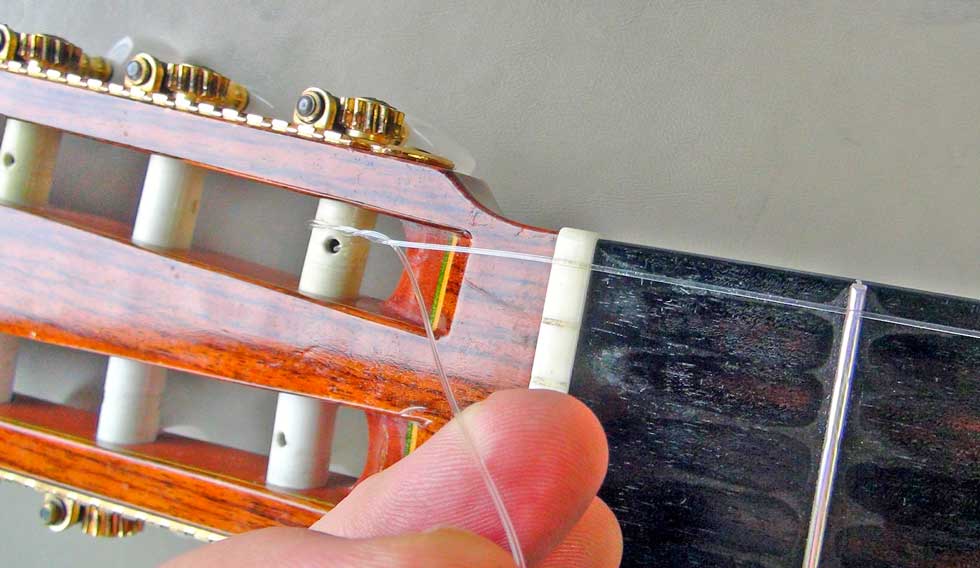
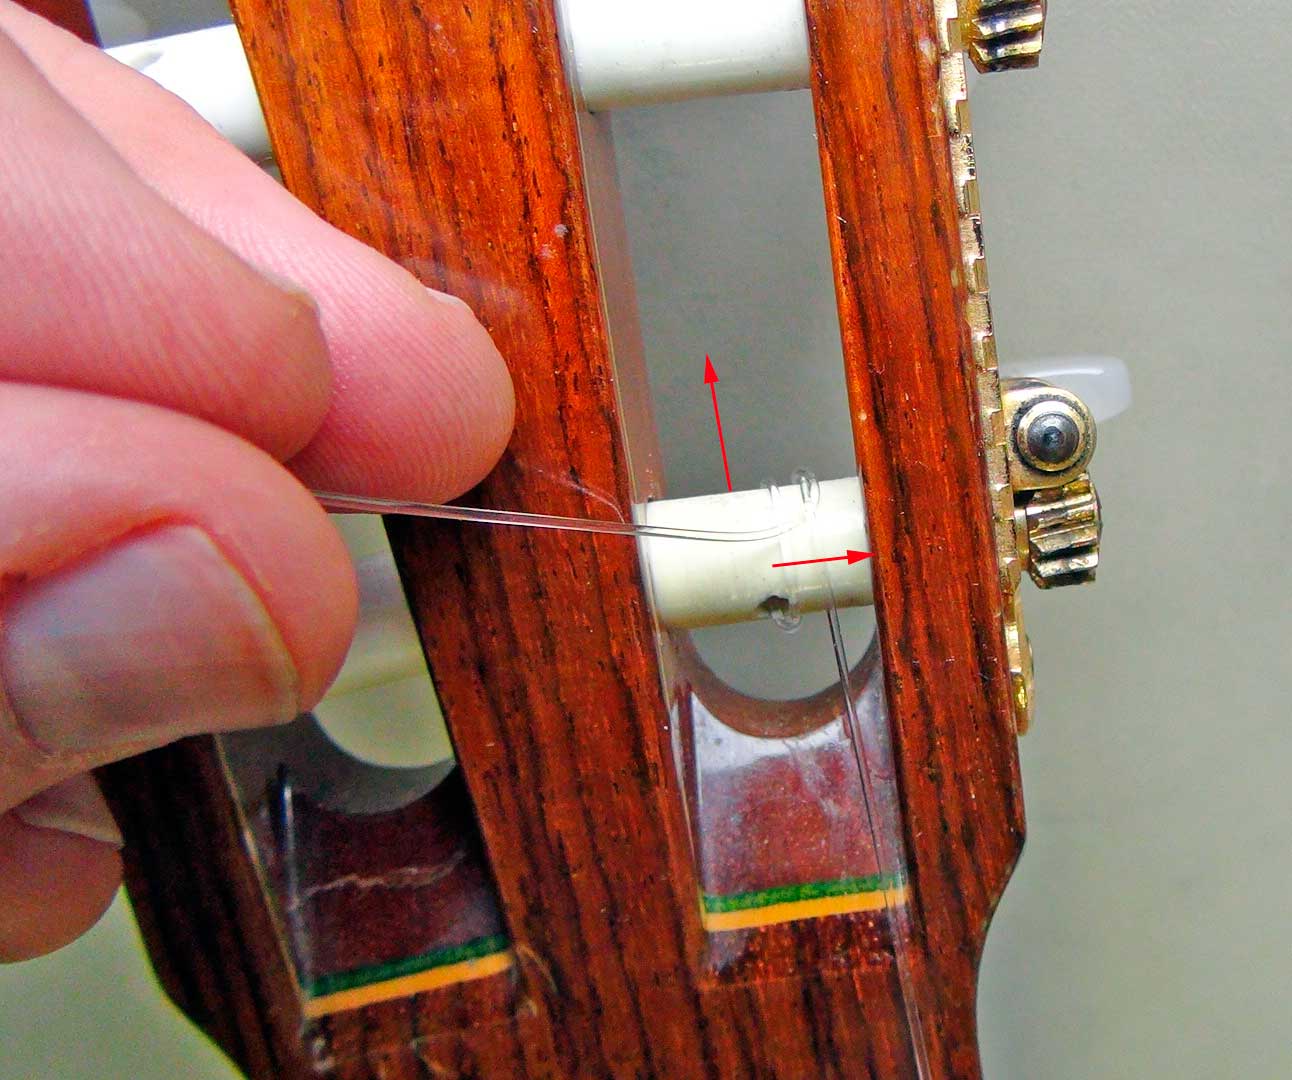
14. Let's attach the string to the bridge first. Guitars that are made to use nylon strings have bridges onto which the strings are tied. The process of attaching a string is a bit confusing to describe, so refer to the pictures below to clarify things. First, pass the string through the right most hole on the soundhole side of the bridge. (With some nylon strings, one end is colored or in some other way different from the other end. You may attach either end to the bridge, except where the "wound" strings - four through six - may have distinctly different ends. We'll discuss this below.) Second, allow about four inches of string to pass through and pass it back around the top of the bridge and under the string at the other side. Third, pass the string around the top of the bridge and through itself at least three times. You should have at least an inch of string left over. The secret to attaching this string securely is to make sure to pass it through at least three times. This will allow the string to attach securely enough to not slip out when the string is tuned up to pitch, when a great deal of tension will be applied to the string. Fourth, pull both ends to tighten the knot around the bridge.
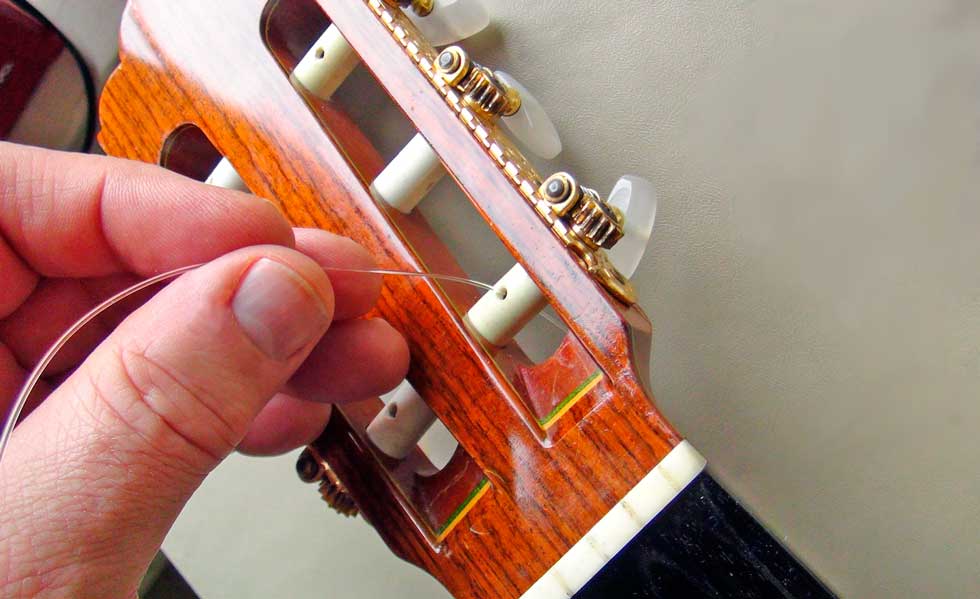
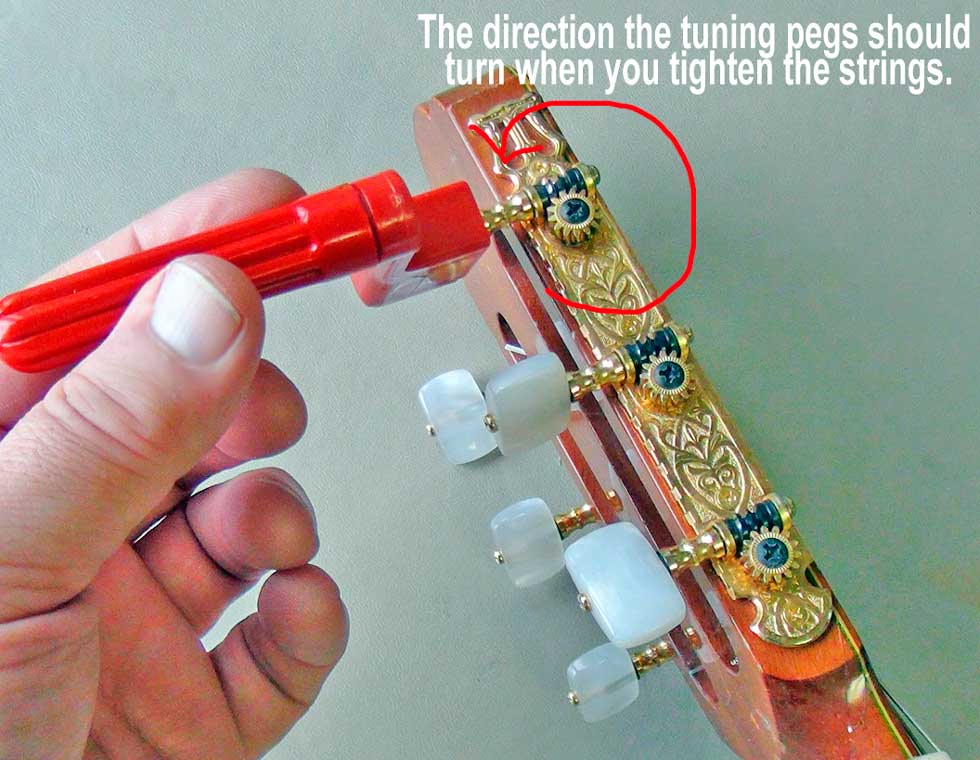
15. To attach the other end of the string to the tuning peg, follow these steps. (Again, refer to the pictures below for clarification.) First pass the string through the peg hole, bring it back around the top, and pull it tight so that there is no slack. (If you don't remove the slack you'll end up wrapping too much string around the tuning peg.) Second, wrap the string around itself a couple of times. (This will hold the string against the tuning peg as it's tightened, preventing it from slipping out.) Third, make sure the string is positioned in the correct slot in the nut. Fourth, tighten the tuning peg so that it turns towards the head of the guitar, holding the end of the string so that it doesn't come loose. As you turn, the loose end of the string will get trapped against the tuning peg, and each rotation of the peg will have the string moving towards the outside. (This does not hold true for all of the strings. You will see a picture further below that will clarify this.) You can tighten the string up to pitch now, but watch the end of the string at the nut very carefully. It will slip slightly as you tighten the string but it should eventually stop. If it does not stop, and you see it gradually slithering out of it's knot, very quickly loosen the string and recheck the knot at the bridge. As mentioned previously, if you have not made sure to wrap the string around itself at least three times at the bridge, it may "whip out" at high speed as you tighten the string, creating a mark in the finish of your guitar. You can tune the string up to pitch now, but because nylon stretches, you will have to tune this and the other strings many times till they somewhat retain their pitch. (Nylon strings never stay in tune. As they say, anyone who has played a nylon string guitar for thirty years has no doubt spent nearly half that time tuning it.) ;-)
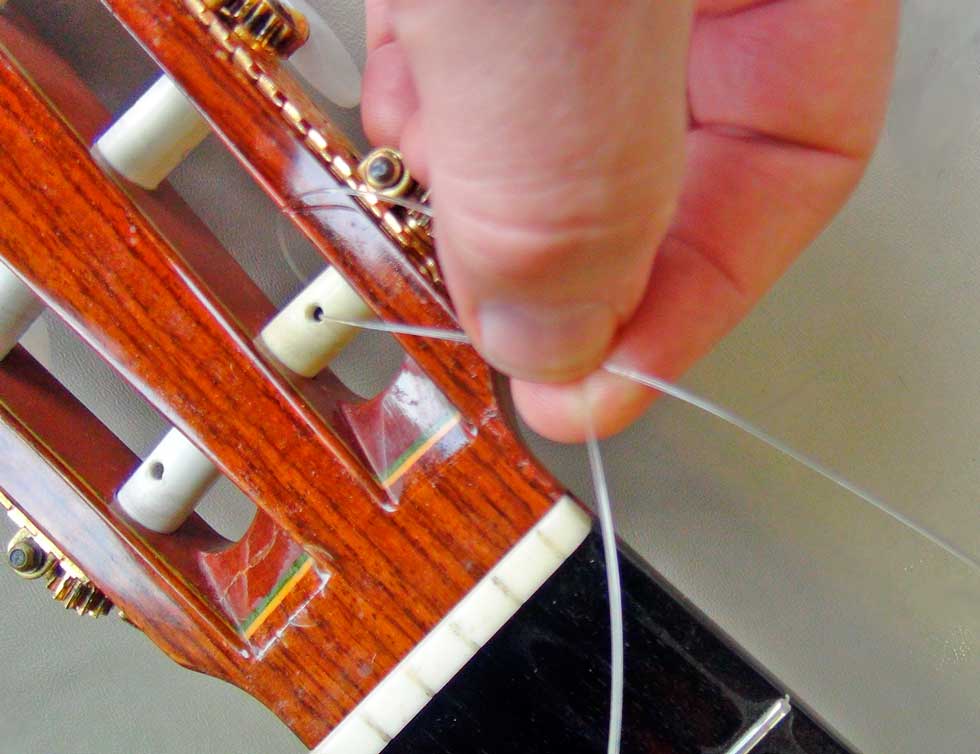
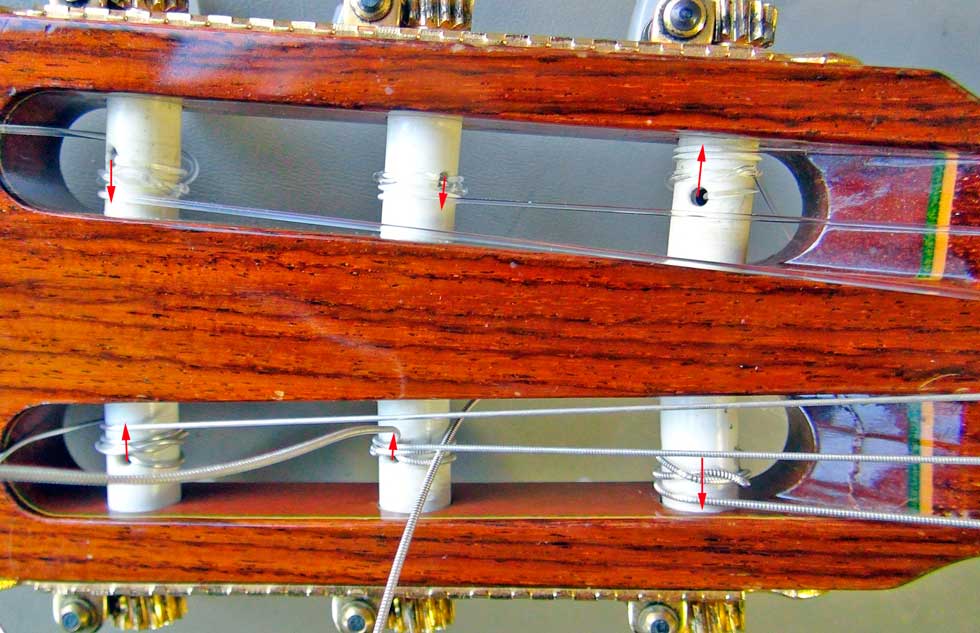
16. You can install the other strings using the steps outlined in number fifteen above, with a few exceptions. First, because the second through sixth strings increase in diameter, you won't be able - nor do you need - to wrap the string around itself three times at the bridge. You should do so for the first three strings, but the fourth, fifth, and sixth require only two (sometimes only one). Second, the strings will wrap themselves around the tuning peg in different directions, sometimes towards the outside, sometimes towards the inside. Refer to the picture below. (Don't confuse this with the way the tuning peg is tightened, which is always the same - as pictured above.) Third, sometimes the fourth, fifth, and sixth strings have slightly different ends, one wound tightly while the other is wound loosely. I have found that using the less tightly wound end at the tuning peg - where it will get cut off as described below - is best. If you use the less tightly wound end on the bridge it has a tendency to break.
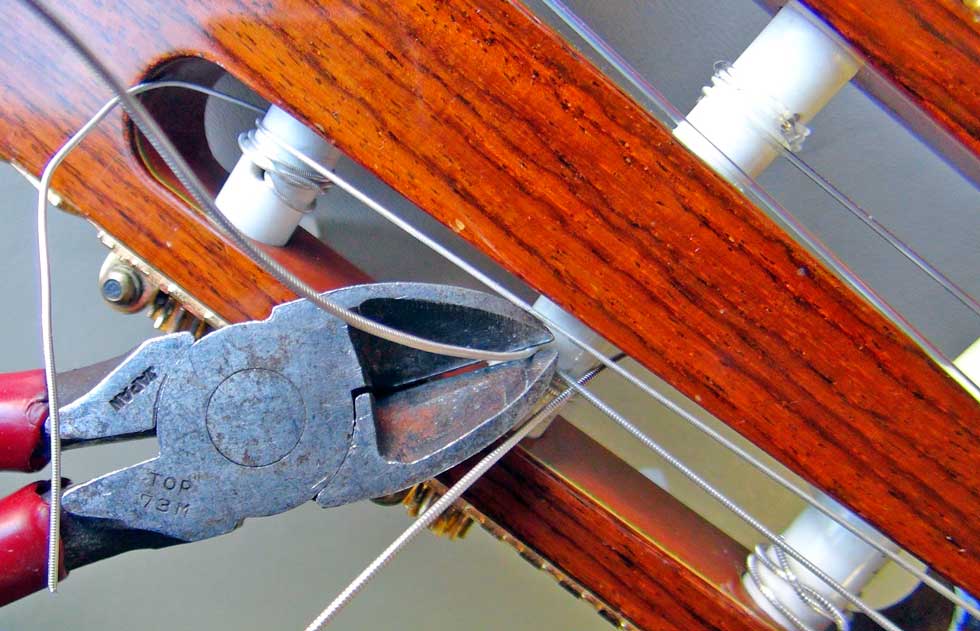
17. The final step is to cut the extra ends remaining at both ends of each string. When you trim the end of the string at the nut, do so after you have tuned the strings up to pitch. Here's a final tip: Sometimes the ends of the string at the nut can vibrate sympathetically if they are allowed to touch the guitar, so bend them up and away from the body of the guitar.
Changing strings on a nylon string guitar involves many not-so-obvious pitfalls. I hope you have found this web article helpful. Please let me know if you have any questions.
Jeff Anvinson, owner/operator of JLA Music
Website and most graphics are created inhouse by Jeff Anvinson, Owner/Operator of JLA Music
Some graphics are purchased from Can Stock Photo, used by permission, and are Copyright
© Can Stock Photo
JLA Music takes care not to infringe on anyone's rights. Please contact us at jla@jlamusic.com if you have questions.
Copyright 2025 © Jeff Anvinson, JLA Music